

Bread and Butter

Two quick housekeeping items before I launch into this week’s menu. First, if you’ve cooked dishes, or meals from recipes on the weekly menu, I’d love to hear about it. Send me pics and comments and I’ll include them in a future edition. Just respond to this email with photos, where in the world you’re reading this, and how you’d like to be named.
Secondly, I need your help to grow our little community of food nerds. Share the Weekly Menu with anyone else you know who’s interested in great food and snarky commentary! Thanks.

Friday morning, I woke up hours before dawn. I looked out the window at the dark streets of our quiet neighborhood, and for the first time this year saw frost on the fallen leaves and the windows of the cars parked on the brick streets. Since then, we’ve had rain, a crazy windstorm, and sunny, clear, cold weather. After weeks of unseasonably warm weather, it’s now unquestionably late autumn.
That, and the state of the world around us, means I’m turning to old familiar favorites. This week’s menu is comfort food. No, not mac and cheese or meatloaf or any of the things that are labeled “comfort food” on mall lot chain restaurant menus (this is not to say that mac and cheese and meatloaf aren’t be delicious), but dishes that make me feel comforted, cozy, safe in my space as the cold and dark of winter slowly creeps up on us.
Easy Overnight French Country Bread
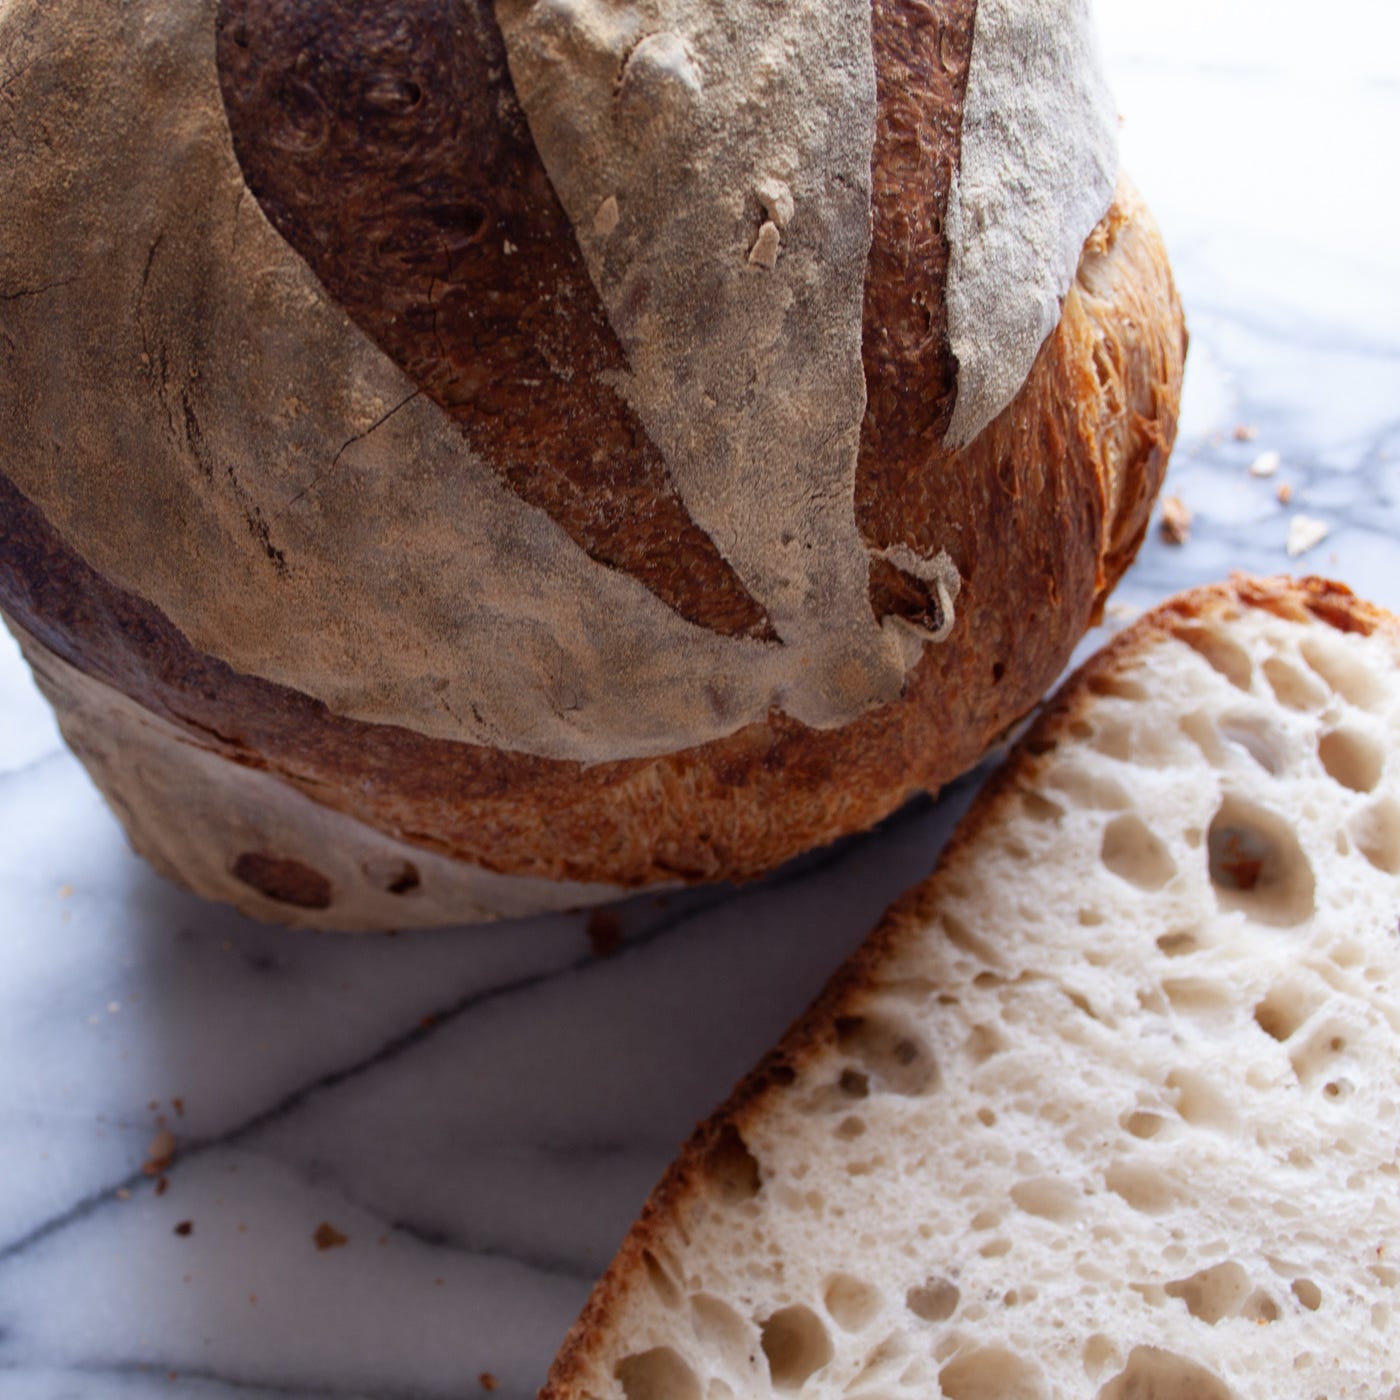
There’s nothing better than homemade bread. Except for good artisan bread you purchase that you don’t have to wait for, clean up from, or spend any time on. That’s better than homemade bread in most ways. Plus, if you’ve got a good bakery near you, you can get other delicious goodies there too.
Unfortunately, I don’t have a really good bakery right close by right now. There are some decent bakeries in town, but owing to a couple of factors (a global pandemic, and the fact that we don’t drive) they’re not really options. That means I bake most of our weekly bread at home. It also means that almost every week we get to enjoy a couple of the things that do make homemade bread better than bakery bought: Fresh-from-the-oven bread and a house that smells like fresh-from-the-oven bread. It’s kind of magical.
This recipe is my go-to for table bread. It can be shaped into baguettes, or a boule, or even a loaf if you so desire. It’s forgiving, simple, and the perfect accompaniment to everything from a saucy stew to a perfect omelet … it’s also great toasted and it lasts for a couple days on the counter. The recipe presented below uses dry yeast, but if you’ve got a sourdough starter on hand, you can use it to leaven the dough. Simply use whatever amount you need based on your starter’s strength and deduct the appropriate amount of water and flour from the recipe. For mine, I would use 100g of a 100% hydration starter (1:1 flour to water by weight), and thus 450g of flour and 275 g of water. The instructions here are for forming a single boule, but feel free to use YouTube or other sources to try other loaf shapes.
500 g Bread Flour
325 g water
3 g instant or active dry yeast
8 g salt
The evening before baking:
Add 325 g room temperature water to the bowl of a stand mixer fitted with a dough hook or to a large non-reactive bowl.
Add 3 g yeast. If using active dry yeast, allow the yeast to proof for 10 minutes or so before continuing. If using instant yeast, proceed to the next step.
Add 500 g bread flour – do not stir yet.
Add 8 g salt on top of the flour.
Mix, either by hand or with the dough hook attachment, until the ingredients are well combined and a shaggy looking dough forms.
Turn out the dough into a large container (you should have 3x the room the dough takes up to accommodate the rise), cover, and allow to rise at room temperature overnight.
The next morning:
Degas the dough by punching it down lightly on a lightly floured surface, and stretch it into a large rectangle. Fold this rectangle as you would a business letter, into threes. Turn the dough 90° and fold into threes again.
Wait 15 minutes.
Repeat the folding action above.
Wait 15 minutes.
Repeat the folding action a third time.
Wait another 15 minutes.
Place a Dutch oven in the oven and preheat your oven to 425° F.
Form the dough into a ball by placing it on a clean, un-floured portion of your work space, placing your open, cupped hands behind it, and gently drawing them toward you. Turn the dough 45° and repeat this until a tight ball has formed with a smooth surface. This video from King Arthur Baking shows the process.
Flour the ball very well and allow the dough to rest on the counter for 15 minutes.
Carefully place the dough ball, bottom side up, into a well-floured banneton or a bowl lined with a floured towel.
Allow to “proof” – rise – for another 35 minutes, or until a finger pressed into the dough doesn’t bounce completely back but just leaves a small mark.
Turn the loaf out of the banneton or bowl and score a large # (or really any pattern you want) over the entire top of the loaf. This will allow the bread to expand evenly.
Carefully place the boule in the Dutch oven, put the lid on, and bake for 35-40 minutes covered. Remove the lid and bake another 10 minutes.
Remove, cool completely, and enjoy.
Cultured Butter

Butter is one of those simple luxuries that we often overlook. We buy “spreads” and blocks of high moisture commercial butter in sticks. Why? Because even those taste good. But there’s something truly exceptional about really good butter. Butter made with really high quality cream, transformed by fermentation, and carefully churned and washed.
I like making my own butter. It’s inefficient. It’s not economically smart. It’s messy. But the process is meditative and simple and the results are just amazing. You can simply start with fresh cream and make “sweet cream” butter, but I love the depth of flavor you get in cultured butter. Funky, slightly acidic, and somehow improbably more buttery.
You’ll need the following tools:
A stand mixer with a paddle attachment
A fine strainer, or a colander lined with butter muslin or several layers of cheese cloth
A non-reactive container for culturing the cream.
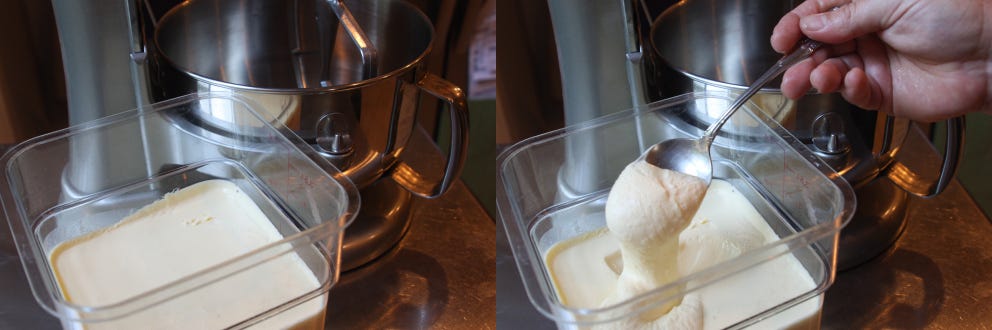
Culture the Cream: I started with a half gallon of Snowville Creamery whipping cream, but any good cream will work. The higher the quality of the cream, the better the end result. Inoculate the cream with a little cultured buttermilk or live yogurt (I used a 1/4 cup cultured buttermilk for a half gallon of cream), and allow the culture to sit, covered, at room temperature for 12 to 24 hours. The result will be a thick mixture akin to thin sour cream or creme fraiche.
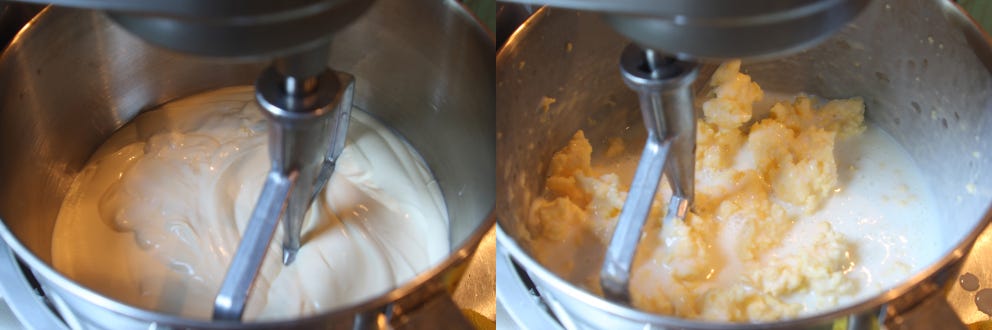
Churn the Butter: Chill the bowl and paddle attachment of a stand mixer by placing them in the refrigerator or freezer. You can skip this step, but does help make washing the resulting butter a little easier in the next step.
Add your cultured cream mixture to the chilled bowl of the stand mixer. Attach the paddle, and churn on a low/medium speed until the butterfat begins to form into clumps and the buttermilk separates from the fat. The butter is ready for the next step when the fat is forming into large clumps and the buttermilk is sloshing around the bowel.
Wash the Butter: Remove the bowl and paddle from the machine, and carefully drain as much of the buttermilk as possible. Don’t throw it away! This is real cultured buttermilk, and you can use it for baking, marinades, and even drink it … if you’re kinda weird. Prepare a large container of ice water. Return the bowl with the drained butter and the paddle to the machine. Turn the mixer on low, and pour a steady stream of ice water into the bowl. After a few seconds, repeat the first step – draining the bowl of water. Repeat these steps 2-3 times, or until the water runs mostly clear. The more buttermilk you remove from the butter, the longer it will keep. Turn the washed butter out into your strainer or colander and rinse one more time, using your hands or a cold fork to slightly break up the mass. Allow the butter to drain in a cool place for a few minutes.
Knead and Shape the Butter: Finally, we need to knead the butter. This both helps force out excess water added in the washing step, but also helps give the butter a smooth, elastic texture. You can knead the butter on pretty much any hard surface. I’m lucky enough to have a marble pastry board that keeps the temperature even. A granite counter top is great too. I place a couple of kitchen towels under the edges to catch the moisture, and use two bench scrapers to knead the butter. You can use almost any tool, including your hands, but keep in mind the butter should be kept as cold as possible through the process. Knead until water no longer is released. At this point, if I were making salted butter, this is where I would add salt. If you choose to salt your butter, you want to knead in approximately 1 tsp of salt per pound of butter. Salted butter has a longer shelf life, but often shouldn’t be used in baking or other cooking because you’ll end up over salting you end product.
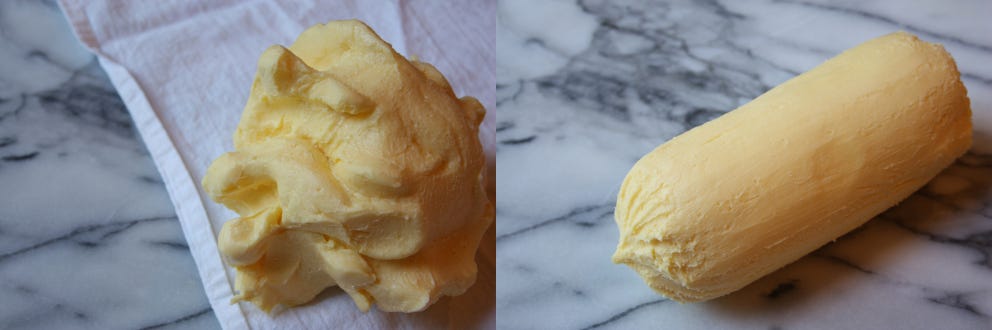
You can now shape your butter in whatever way you want. Sometimes I simply scoop it into a prep cup and grab a few tablespoons whenever I need it. Most often though, I use a muslin towel to shape a large roll and cut of slices as needed.
Kale Salad with Apples and Walnuts
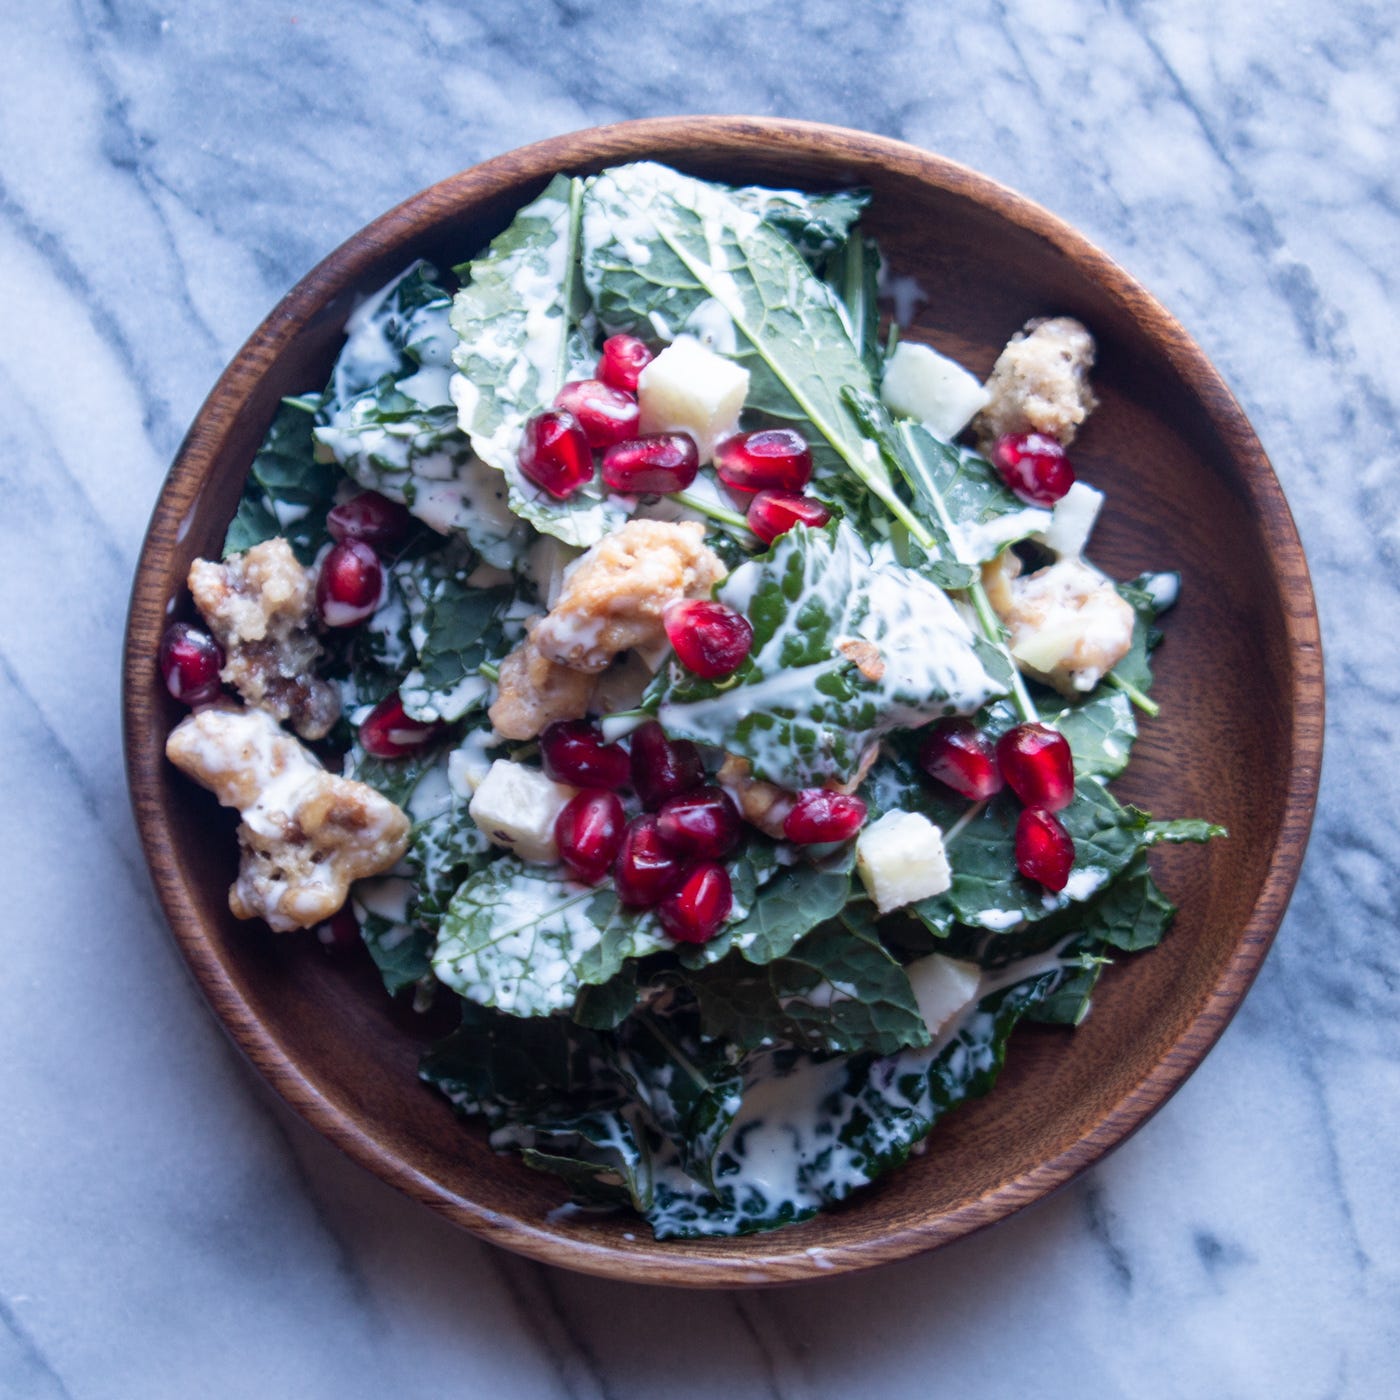
I know I’ve made fun of kale salads in past newsletters, and on twitter, in casual conversation, heck I’ve probably yelled it in the street. It’s not that I hate kale, it’s that it became so ubiquitous so quickly that not everyone took the time to make the dishes they served with it, well … good. Kale piled with pieces of nearly raw sweet potato, scattered with soggy grain, and dressed with tahini is a perfect combination of “this week’s superfoods” but it may not actually be good unless someone’s really taken the time to get it right. This salad is not fancy, but I hope you enjoy it. It’s not a lunch salad or a dinner salad. It’s a component of a larger meal, a sweet, sour, bitter, earthy accompaniment to a rich center plate. The sweet crunch of the apples and candied walnuts counter the butter greens, and the creamy cider vinegar dressing balances the earthy funk with brightness. I use young, tender kale – mostly because we grow it in tiny urban garden, and I have easy access to young Lacinato kale leaves. I would recommend using packaged baby kale, or finely chopped mature kale in its place.
2 cups loosely packed baby kale
1 apple
¼ cup candied walnuts
¼ cup pomegranate seeds
1 clove garlic
1 tbsp cider vinegar
1 tsp Greek yogurt
1 tbsp mayonnaise
½ tsp kosher salt
1/8 tsp Dijon mustard
½ tsp fresh ground black pepper
1 sprig fresh thyme
Peel, trim, and Microplane or crush the garlic into a non-reactive bowl.
Add the cider vinegar and salt to the bowl and allow to rest 5-10 minutes. This will mellow the garlic.
Whisk in the yogurt, mayonnaise, mustard, black pepper, and picked leaves from the thyme.
Chill for 30 minutes.
Peel and dice the apple, discarding the core.
Toss kale, apples, and walnuts with the dressing, plate, and scatter with pomegranate seeds and additional thyme leaves.
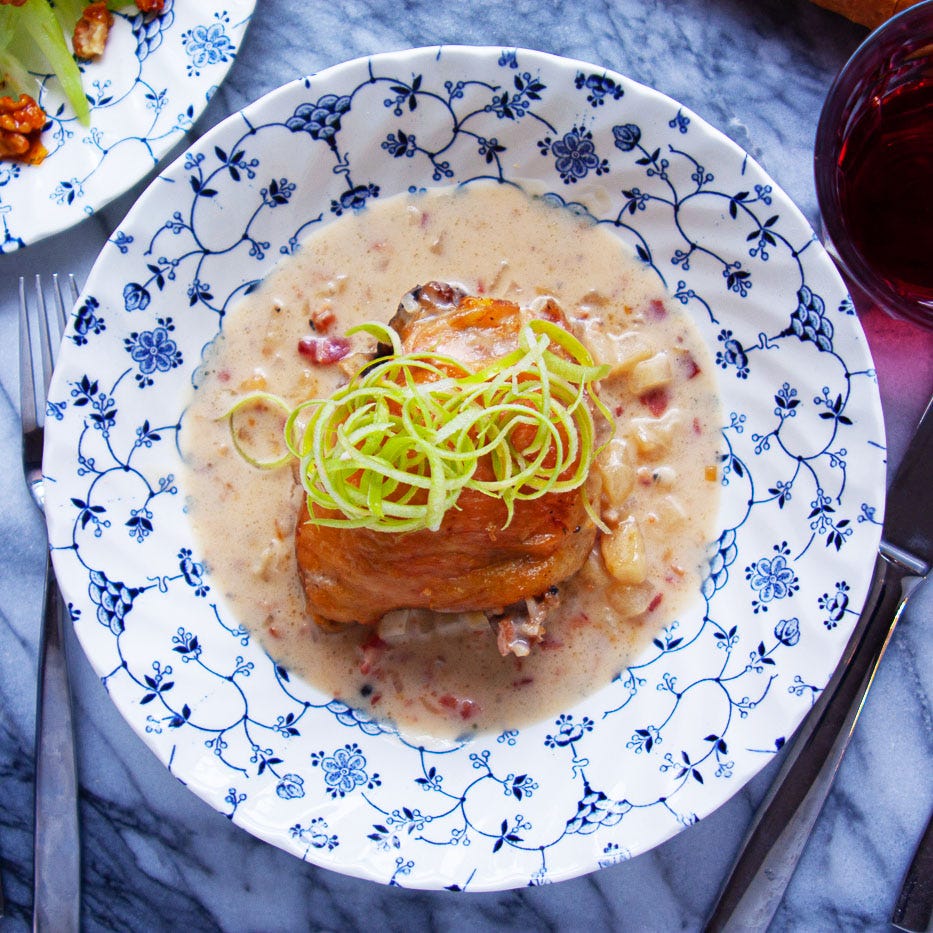
Chicken Braised with Bacon, Apples, and Cider
I originally posted this recipe over at my other project, The Chicken Thigh Guy. If you follow me there, it’ll be familiar. I’m sharing it here because quite simply, it’s one of my favorite dishes and one I make over and over – particularly when I’m feeling a little low and I just want something really really good that doesn’t require a lot of thought.
This simple dish is essentially chicken à la Normande, a French-style braise made popular in the 1960s. I know it is something that showed up on my parents’ table as a dinner party dish in the ‘80s. It’s rich, produces a wonderful sauce, and is relatively easy to prepare. An easy extra step with green apple peels creates a stunning presentation. Add a simple salad, good bread and butter, and it is downright luxurious on a cool fall night.
This preparation uses an open braise to produce an evenly-browned, slightly crispy skin on top of a lusciously tender braised meat. The cider, apples, thyme, and shallots add layers of tangy aromatics, and the bacon adds a smoky depth. The final addition of cream smooths it all out and brings it together in a sauce that could almost be a dish on its own. Plus, it’s great with crusty bread to mop it up. As always.
You can use either a sparkling or flat hard cider in the dish but do not substitute fresh (unfermented) cider because the unfermented sugars will vastly alter the taste of the dish.
4 bone-in, skin-on chicken thighs
1 cup light chicken stock
1 cup dry hard cider
1 oz brandy or apple brandy (opt)
¼ cup heavy cream
2 pieces smoked bacon
1 Granny Smith apple
1 medium shallot
4 sprigs fresh thyme
1 bay leaf
Salt and black pepper to taste
Preheat your oven to 300° F.
Peel and mince the shallot.
Peel the apple, reserving large pieces of the peel in water for garnish.
Cup the apple into ¼ or smaller diced pieces. Discard the core.
Cut the bacon crosswise into ¼-inch strips.
Place the bacon pieces and 1 tbsp of water in a cold, lidded, shallow pan with sufficient space for the chicken pieces.
Over medium heat, render the fat from the bacon and cook until crisp, stirring frequently to reduce pan browning.
Once well-browned, remove the bacon pieces and set aside.
Season and brown the chicken on both sides. When well-browned, set aside. Drain the fat and drippings from the pan, reserving 2 tbsp of fat.
Return the reserved fat to the pan, along with the shallot and apples. Sauté until the apples are slightly softened, and then deglaze the pan with brandy(if using) – flambéing to burn off the alcohol.
Return the bacon and chicken pieces to the pan.
Add stock and cider before tucking the thyme and bay leaf into the pan. The chicken should not be fully covered.
Braise uncovered in a 300° F oven for 1 hour or until chicken is very tender (up to 90 minutes depending on the size of the thighs).
When fully cooked, remove the chicken pieces to a plate, add the cream, and reduce the liquid by half over medium heat.
While braising, use a very sharp knife to cut long, very thin strips of peel. Place these in a cup of ice water. They will curl up like small ribbons.
Return the chicken to the pan to warm through and garnish with fresh thyme sprigs and julienned pieces of bright green peel.
Serve with a good crusty bread.
Rustic Seckel Pear Tart

Seckel pears are almost too damned cute. They’re like the emoji versions of real full-sized pears. They’re tiny, perfect, green with a red blush. They’re also one of the few cultivated pear varieties that are distinctly American – they originate in the Philadelphia area sometime before the American Revolution. When they appear this time of year, I can’t resist. I love the little things. I’ve made poached pear deserts with them, slowly stewing them with red wine and baking spices. Sliced them into salads, served them alongside a cheese place, and even dipped them into red-dyed, cinnamon spiced hard candy to make tiny, shiny red candy apple-style bites. But unless I’m hosting a dinner party, I’ve always got too many. That means they get made into this gorgeous and rustic pear tart. I bake the pears whole, nestled into a hand-formed crostada-style crust, and resting on a simple custard spiked with goat cheese and cinnamon. It’s sweet, sour, warm and has that familiar strangely wonderful almost sandy texture of a good ripe pear.
½ recipe King Arthur All Butter Pie Crust
12-16 small Seckel Pears
2 eggs
½ cup plus 2 tbsp sugar
¼ cup heavy cream
2 tbsp chevre
¼ tsp cinnamon (fresh grated is best)
Preheat your oven to 350° F.
Roll out the pie crust on a well-floured surface.
Remove the stems and trim the flower end of each pear.
Arrange the pears top side up on the pie crust, leaving 2-3 inches around the pears.
Fold in the sides to form a crostada.
Transfer the pie to a lightly greased baking sheet.
Combine ½ cup of the sugar, the heavy cream, chevre, and cinnamon in a bowl and whisk well.
Pour the custard mixture into the crust between the pears.
Sprinkle the remaining 2 tbsp sugar over the pie and crust.
Bake for 30-45 minutes or until the crust is uniformly brown.
Cook completely.
Slice and serve.