


Italian American “Sunday gravy” is one of the great American food traditions.
It’s not my family’s tradition. Most of family’s traditions (except our dedication to Mexican and southwestern foods) are firmly rooted the various variations on “Meat and Three” – of which there are probably five. We ate spaghetti, always with “meat sauce” and cheese shaken from a green can. It was homemade, my mom’s take on her mother’s recipe. Gram was Scottish, but her meat sauce was still a tasty meal.
Like many Americans of my era, I didn’t learn about Italian American meat sauces from family recipes or stories, or from kind neighbors, or from high school job with a gruff but lovable chef.
I learned about it from Goodfellas.
My movie obsessed friends and I talked about it for years.
In the years since, I’ve learned a lot more, and some variation on Sunday Gravy – a multi-meat loaded rich tomato sauce – has become a kitchen staple in our house. Part of that is that despite it not being part of my family’s traditions, it is part of my wife’s. Her grandmother would make a big pot of sauce laden with lots of meatballs, maybe a pork chop, and some chicken, that simmered all day and then became leftovers for a week or two. They called it “Sauce.” That’s it. Just “Sauce.”
This week’s menu is Sauce. Sauce and a homemade version – or a homage version – of a meal you would have at an old school place: red-check tablecloths, raffia wrapped chianti bottles standing in as candle holders, fake plastic grapevines woven though the décor. So throw it in a pot, spend the afternoon enjoying the smells that will fill your house, and enjoy a big bowl of pasta. Just don’t use a razor blade to cut the garlic like the guys in Goodfellas. You’ll cut yourself … and you’ll burn the garlic.
As always, if you enjoy The Weekly Menu, share it with friends, share pictures if you cook anything from it, and check out my other food project, The Chicken Thigh Guy - and follow The Chicken Thigh Guy on Instagram.
Garlic Bread “Babka”
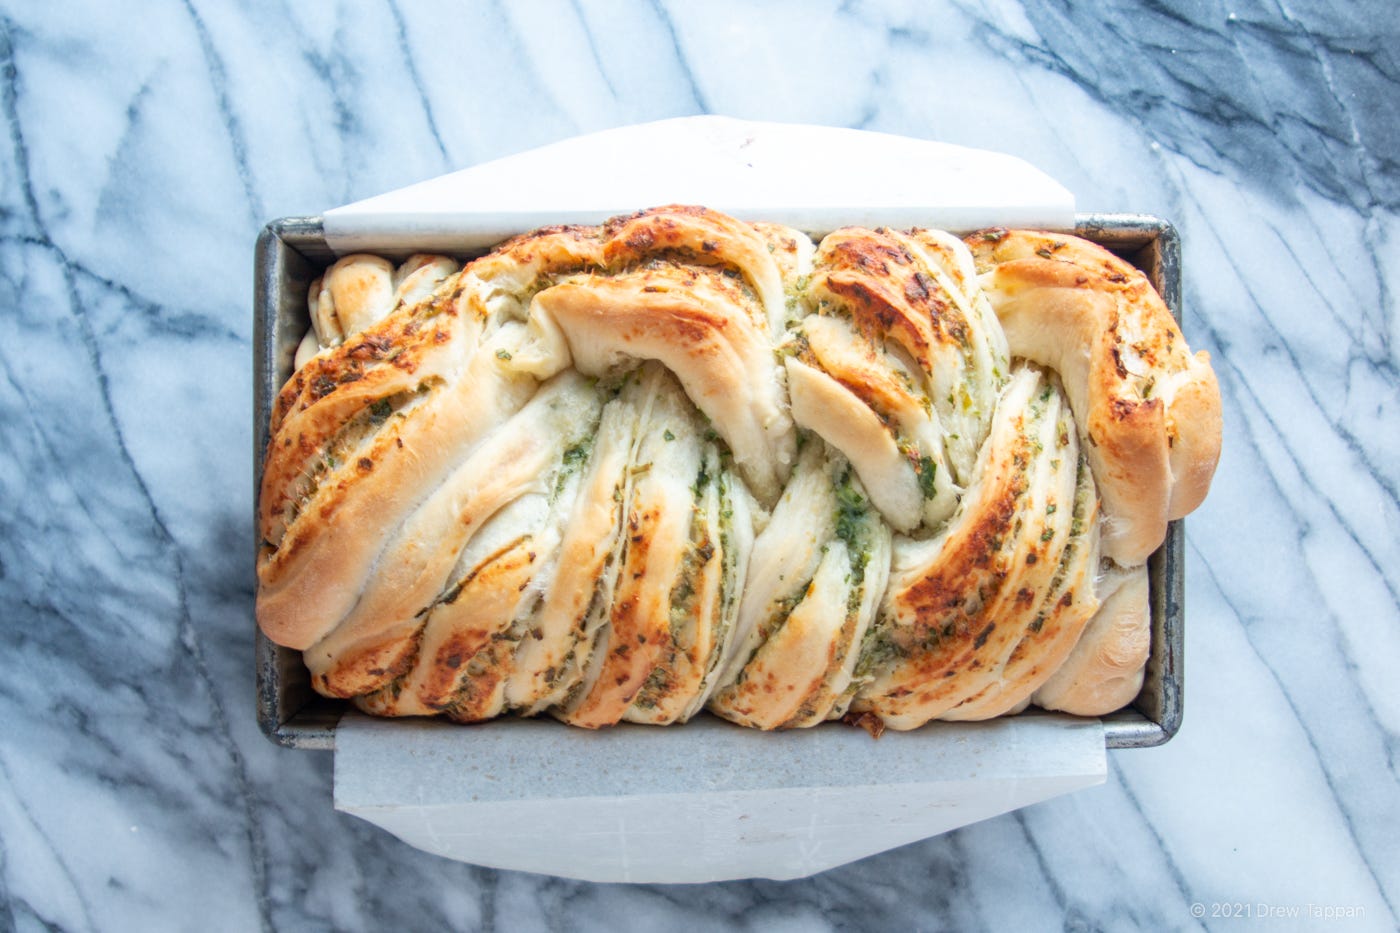
I first made this a few weeks ago on a whim, and if you follow me on Instagram, you may have seen the first iteration of it there. It’s not a babka, but the technique – the braided layered rolls that make Babka unique – is the same. The result is a tender, rich garlic bread that slices like sandwich bread (and from whose leftovers you can make obscenely delicious, slightly over the top crispy garlicy grilled cheese).
Makes 1 loaf
350g AP flour
220g room temperature water
15g olive oil
5 g granulated sugar
7g yeast
5g kosher salt
6 tbsp softened unsalted butter
½ cup grated parmesan
¼ cup finely chopped parsley
½ tsp kosher salt
4 cloves garlic, peeled, trimmed, and crushed or microplaned
Add water, sugar, and yeast to the bowl of a stand mixer allow to rest for 10 minutes for the yeast to proof.
Add Olive oil.
Add flour and salt.
Process with a dough hook until a smooth dough has formed – about 7 minutes.
Cover, and allow to rise in a warm place until doubled in size – about 1 hour.
Preheat your oven to 375°F.
Prepare the filling by combining softened butter, parmesan, parsley, salt, and crushed garlic. If you don’t have a microplane or garlic press, you can crush the garlic by mincing it finely, then using the salt and the side of a knife blade to crush it into a paste using a smearing motion of the blade.
Dived the dough in half, and a shape each half into a ball.
Let the dough relax for ten minutes – this will make the next step, rolling, easier.
Roll each piece into a rectangle of approximately 8x10 inches.
Spread the filling on the rectangle, leaving 1 inch on the long side clear.
Starting with the side spread with filling, roll the pieces along the long side into a roll and pinch the seam closed.
Place the rolls seam side down.
Using a very sharp knife, cut the rolls in half from end to end (not across).
Weave the four pieces into rough a 4 strand braid (for this bread it not only doesn’t need to be perfect, some roughness in form is great) and carefully place into a loaf pan lined with parchment paper.
Allow to proof for about 30 minutes, or until the dough reaches the top of the loaf pan.
Bake at 375°F until well browned on top – 30-45 minutes.
Wedge Caesar Salad
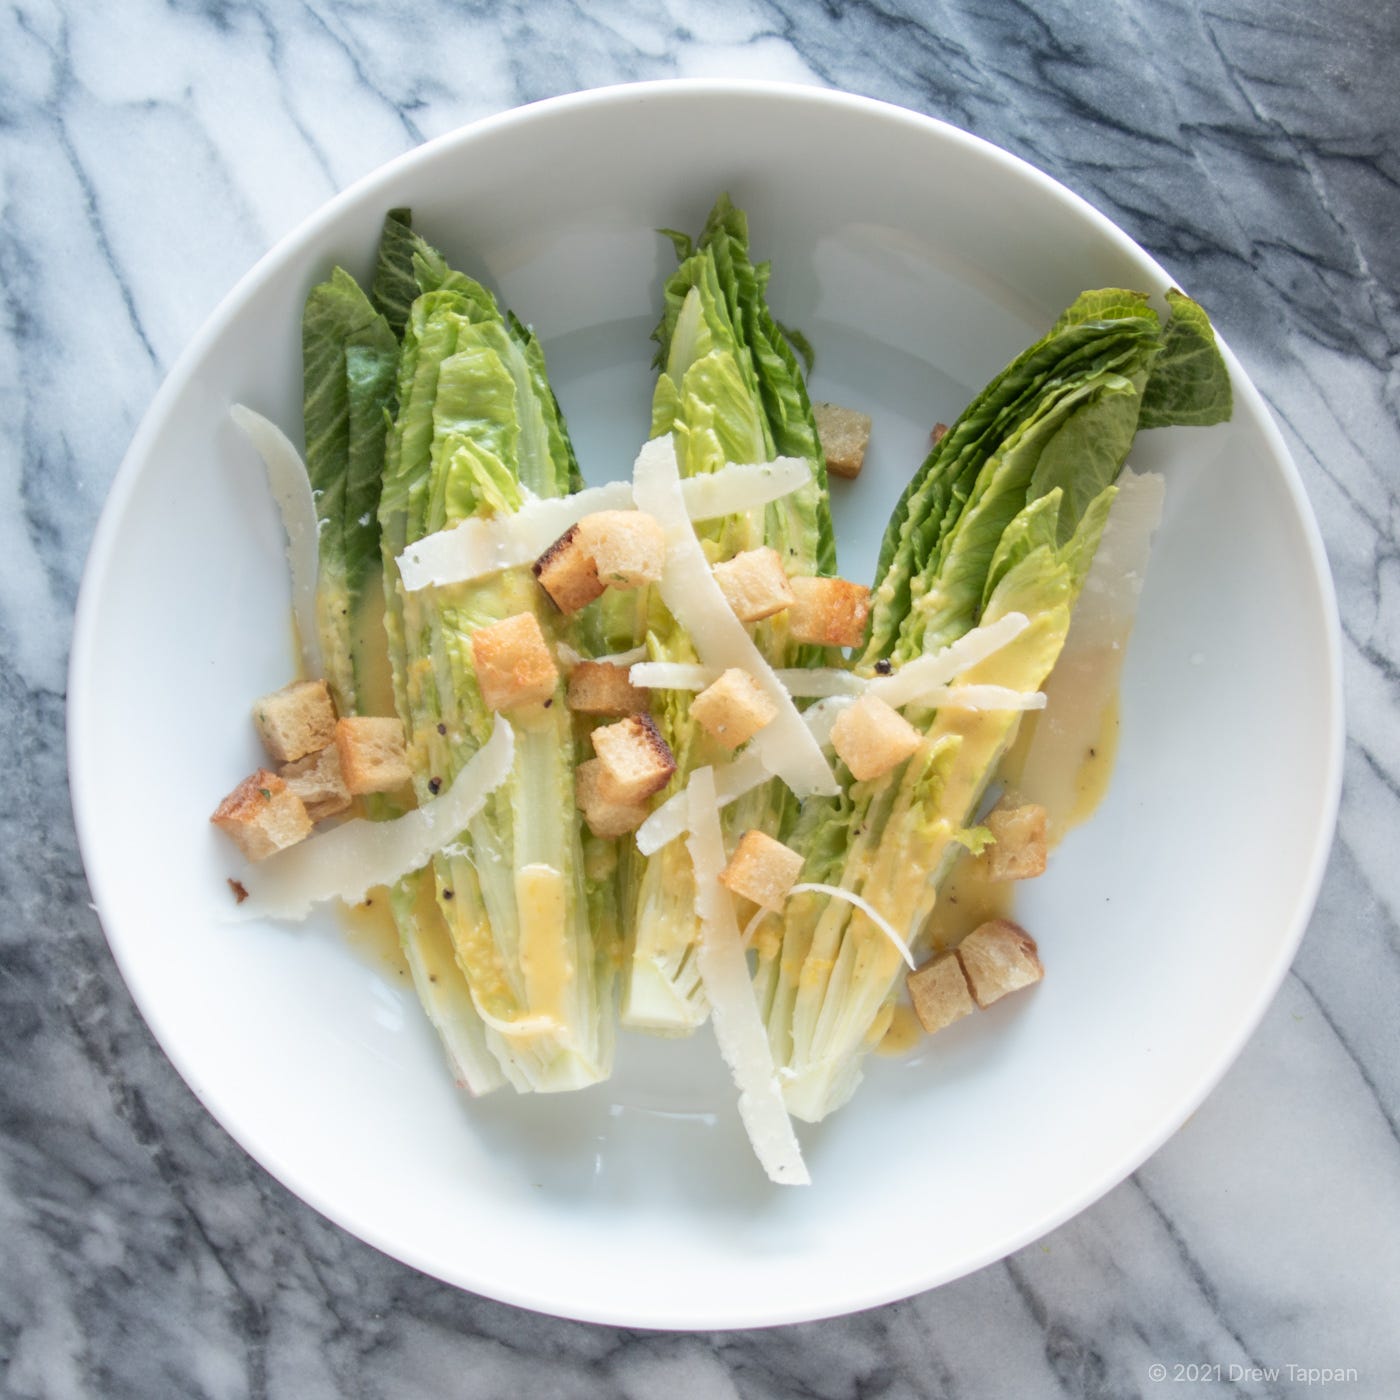
This dish doesn’t really need an introduction. It’s a take on a classic Caesar salad, which was actually invented in Mexico. I add lemon zest to the dressing to make it bright and lemony.
Serves 4
4 small (or 2 large) romaine hearts
1 clove garlic
1 lemon
1 egg yolk
½ tsp anchovy paste
½ tsp Dijon mustard
4 tbsp olive oil
½ tsp ground black pepper
Salt to taste
Parmesan cheese
1 cup small croutons
Microplane about 1 tsp of zest from the lemon into a non-reactive bowl.
Squeeze the lemon into the zest.
Peel, trim, and microplane the garlic into the zest/juice mixture.
Allow to rest 10 minutes. This will help tame the sharpness of the garlic.
Add the anchovy paste, mustard, and egg yolk and whisk to combine well.
Slowly drizzle the olive oil into the mixture, whisking constantly to form a smooth emulsion.
Whisk in the black pepper.
Taste the dressing and season - depending on your anchovy paste, it may need additional salt.
Trim any browning or soft parts from the romaine hearts, including the browning part of the stem end.
Quarter the hearts, wash in clean water, and pat (or spin) dry to remove water.
Arrange the wedges on a plate, drizzle with dressing, top with parmesan shavings (I use a Y-peeler to remove them from a piece) and croutons.
Charred Broccoli with Honey, Garlic, and Red Pepper Flake
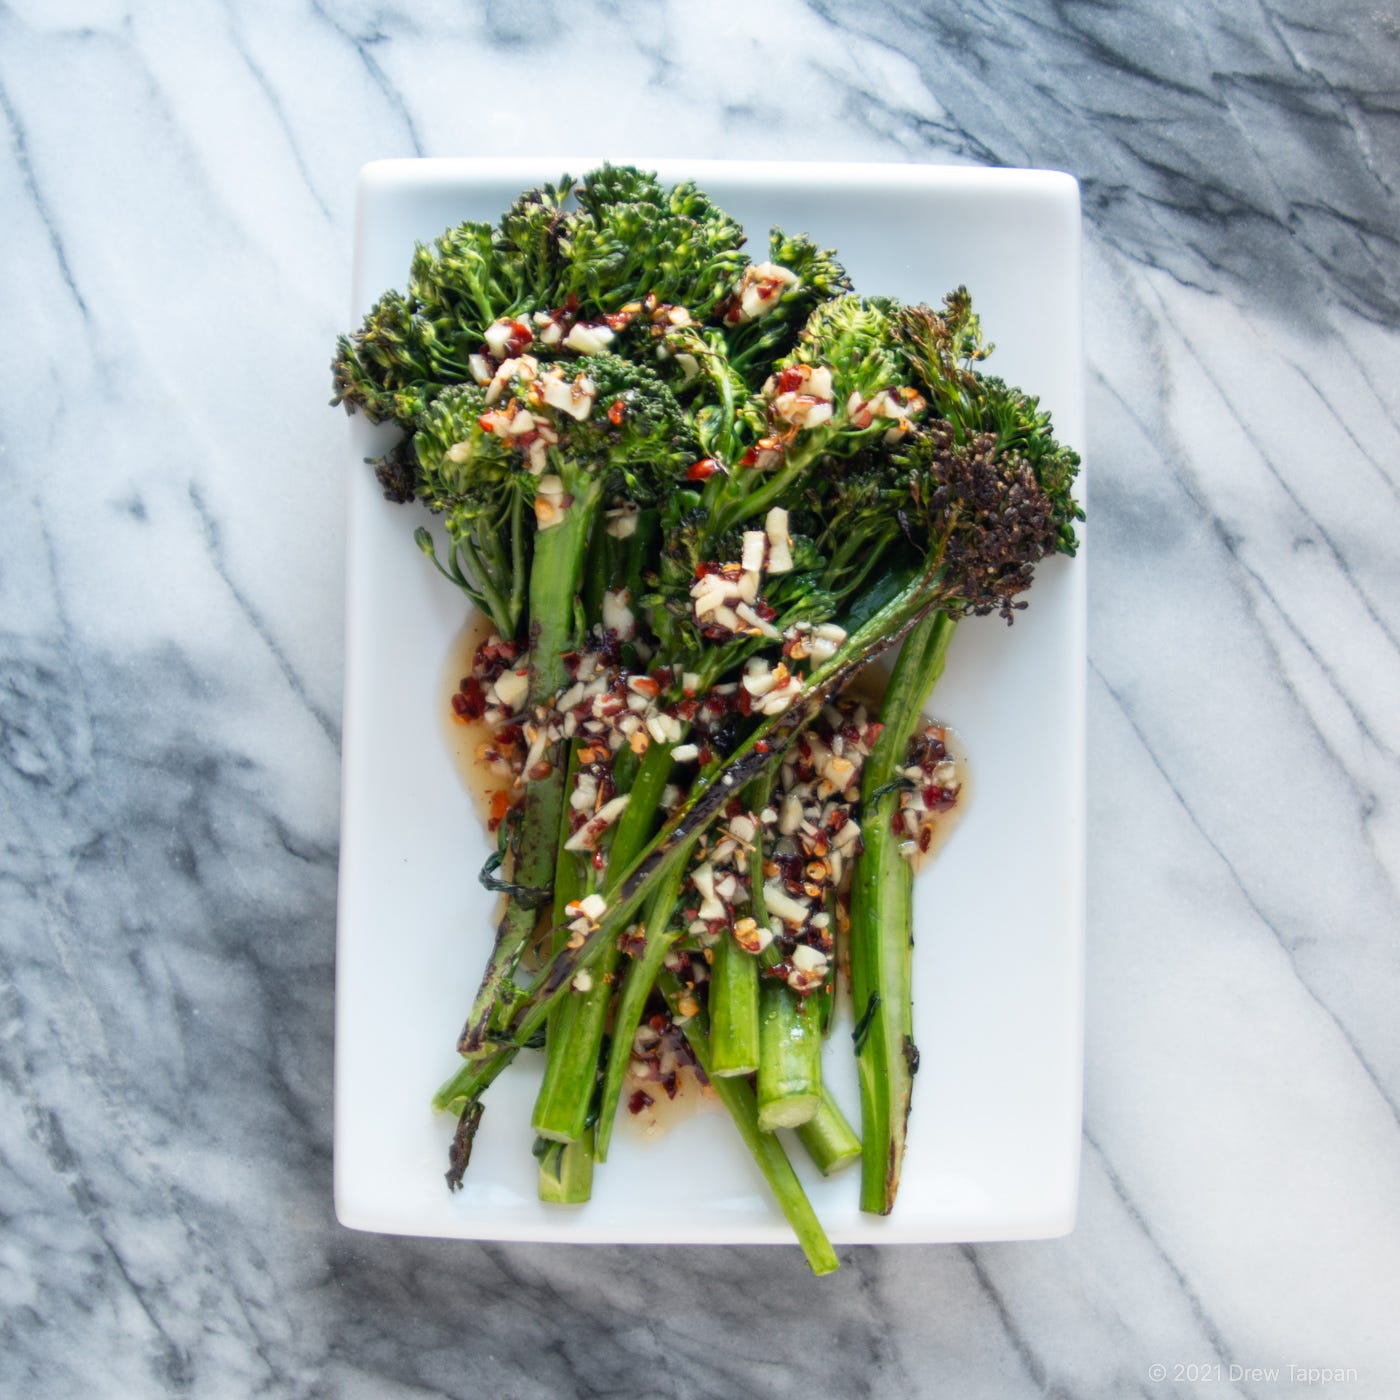
I’ve talked at length here about bitter green salads. My love of the bitter extends to some vegetables as well. Broccoli Rabe – also called Rapini – is a favorite in our house, and its bitter nature makes it a fun canvass for all kinds of other flavors. Here, we’ll dress it with my quick take on “hot honey” and garlic. The dressing is sweet and spicy and plays really well with the bitter notes of the … Oh wait. I couldn’t find rabe this week. Guess what, this works just as well with broccolini, or baby broccoli, or whatever your grocer chooses to call the small floret varieties of broccoli.
To my taste this recipe really is best with aggressively bitter, but that flavor isn’t for everyone, and it’s still delicious with baby broccoli … or even just broccoli. One piece of advice, if you’re using full sized broccoli florets, you might consider blanching them first to speed up the cooking. Just make sure they’re as dry as possible before going into the pan.
Serves 4 as a side
1 lb. broccolini, baby broccoli, or broccoli rabe (preferred)
1 tbsp wildflower honey
1 tbsp minced garlic
1 tbsp olive oil
1 tsp red pepper flake
1 tsp red wine vinegar
½ tsp kosher salt
Combine honey, garlic, all but 1 tsp of the oil, vinegar and pepper flake in a bowl.
Heat a cast iron, carbon steel or other thick bottomed pan over high heat.
Add remaining 1 tsp of the oil.
Immediately add the broccoli or rabe and season with a pinch of salt.
Allow to cook undisturbed until well browned.
Turn the vegetables and cook until the other side is browned.
Dress with the honey, garlic, and pepper mixture.
Serve immediately.
Roasted Spring Onions
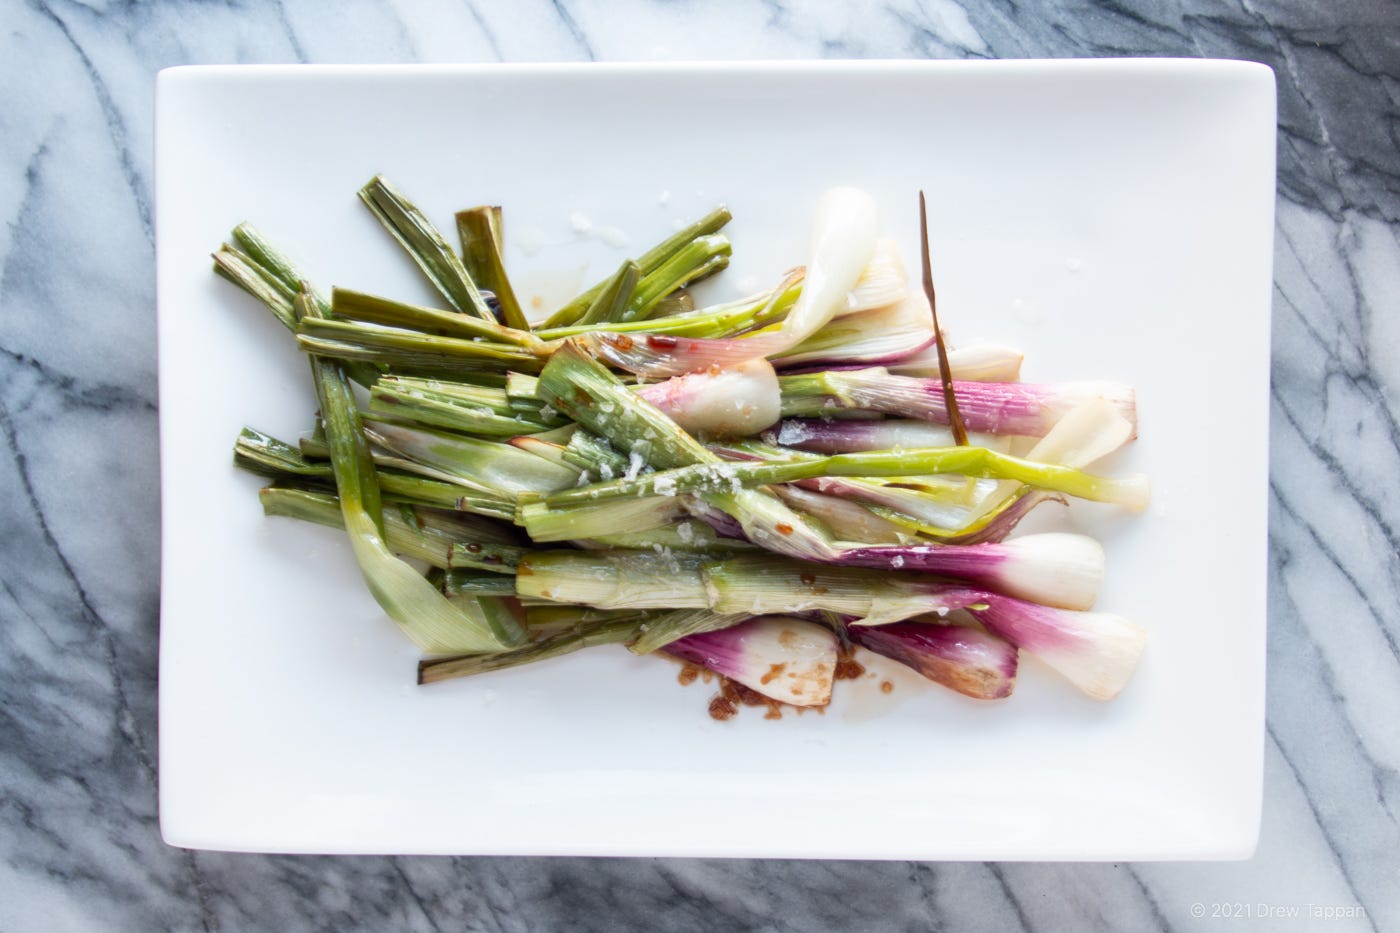
These beautiful, purple-tipped spring onions have just started to appear in our local groceries. I know they’re not yet in season here in Ohio, but I still can’t resist them. They’re gorgeous, slightly sweet, slightly spicy, and need little more than a sprinkling of salt and a touch of acid to bring out their flavor. And yes, that one browned frond sticking up in the picture is bugging the crap out of me.
Serves 4 as a side
1 bunch spring onions
1 tbsp olive oil
1 tsp balsamic vinegar
1 tsp flakey finishing salt, such as Maldon
Preheat your oven to 450°F.
Clean and trim the onions, removing most of the green parts and the roots. If your onions are large, consider splitting them in half lengthwise.
Toss the onions with olive oil and arrange on a sheet pan.
Roast until softened and the edges are just beginning to char.
Remove from the oven, and transfer to a plate.
Drizzle with a little balsamic vinegar and sprinkle generously with flakey salt.
Sunday Gravy aka “Sauce”
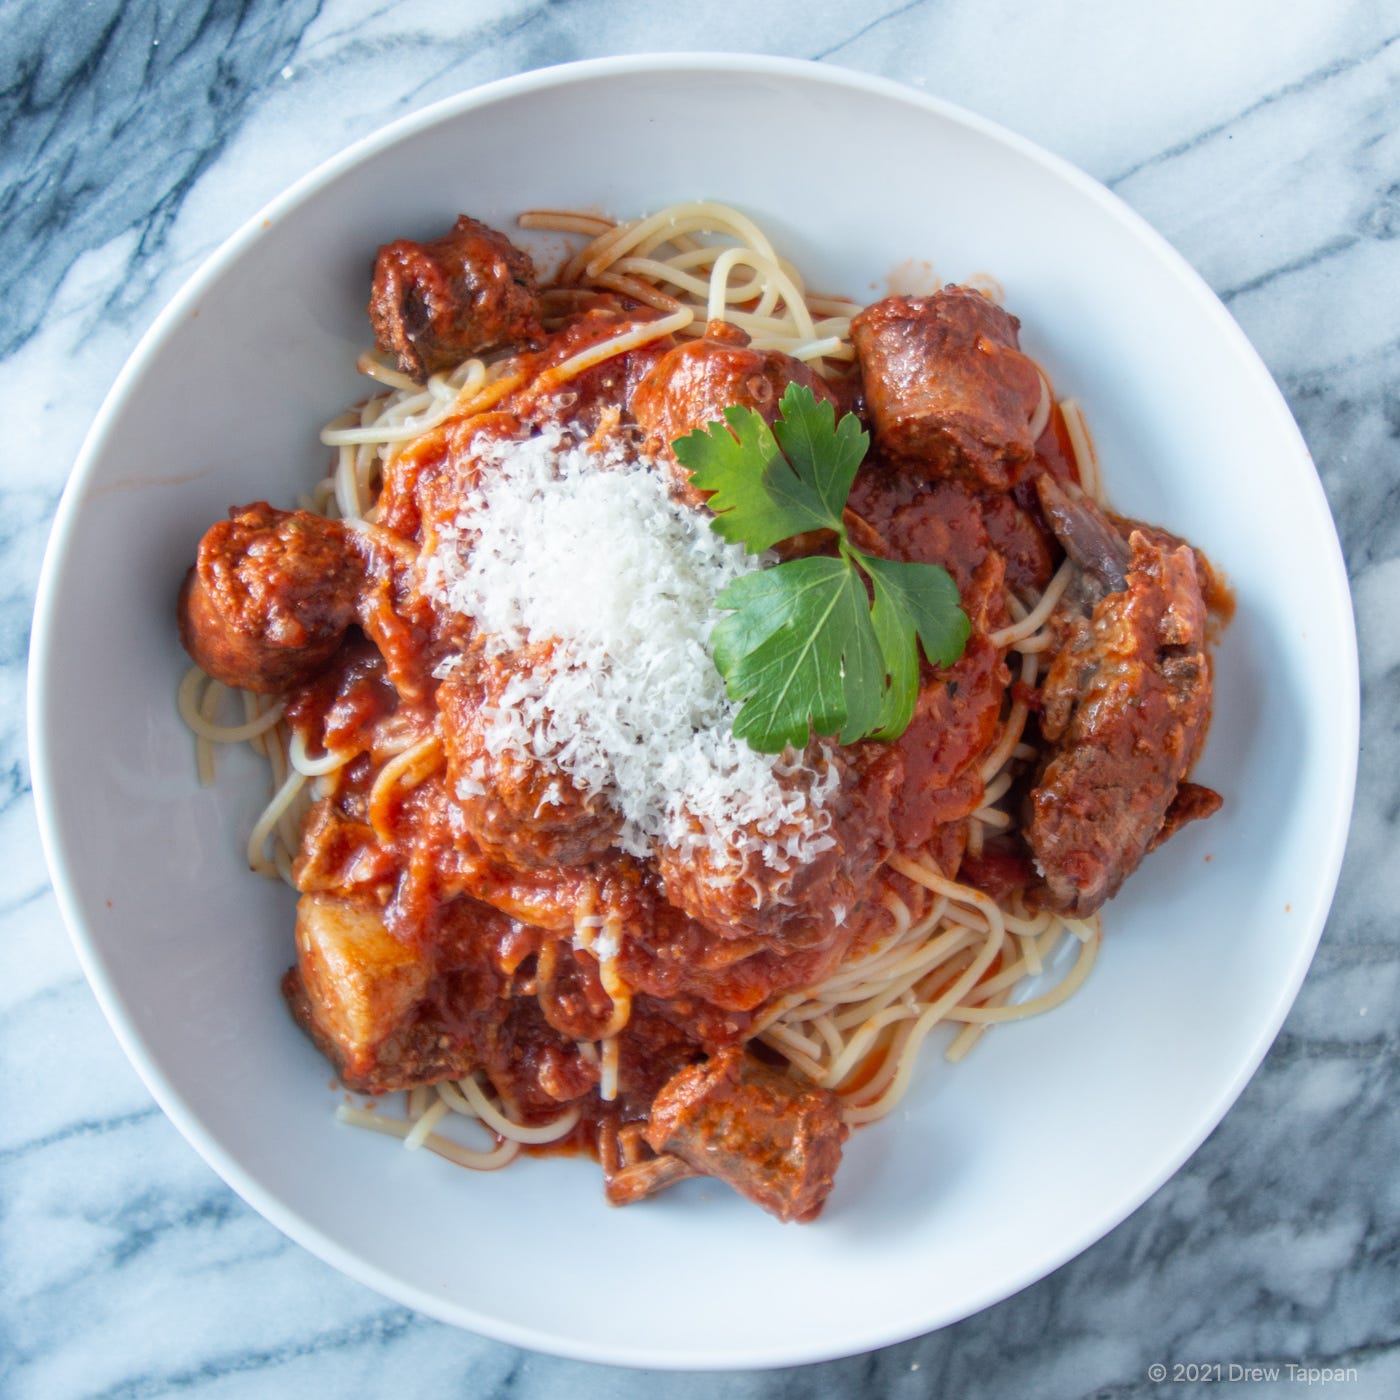
This version of “sauce” is malleable. You can mix up the meats, add other spices, make it your own. This week I added a couple country style ribs – which are actually a shoulder cut – along with sausages I picked up at a butcher shop in the neighborhood where I grew up. The key is the slow, uncovered oven cook. It adds deep browning flavors and intensifies the tomatoes. I don’t add onions, mostly because I like to let the meat speak for itself. You’ll end up with a rich, bright tomato sauce studded with meat, a sheen of red oil (which you can skim off, or use to dress pasta) and impossibly tender fall apart pieces of meat that you pile on top of a plate pasta. It’s pretty much a perfect meal.
Serves many many people
2 cans San Marzano style tomatoes
4 cloves garlic
1/2 tsp olive oil
1 tsp dried oregano
1 tsp kosher salt
1 tsp red pepper flake
2 bay leaves
1 sprig thyme
1 1-2 inch sprig of rosemary
2 cups chicken stock
Meatballs (see below)
4 links Italian sausage (assorted)
2 bone in country style ribs
Preheat your oven to 325°F.
Peel, trim, and microplane or crush the garlic.
Using a whisk, large fork, or potato masher, roughly crush the tomatoes.
Heat a Dutch oven or other large oven proof pan over medium heat.
Cut the sausage links into 2-inch pieces.
Add the sausage pieces and a very small amount of oil, to the Dutch oven and cook until well browned.
Remove the sausage and set aside.
Add the country style ribs, and brown.
Return the sausage, to the pan, along with the meatballs and any other meats you’re adding.
Add the crushed tomatoes, stock, salt, garlic, red pepper, oregano, rosemary, and bay leaves.
Bring to a simmer, then transfer to the oven.
Cook uncovered at least 2 hours and up to 4 hours – occasionally stirring very gently (you don’t want to break up the meatballs or sausage), or until the sauce is thick and has reduced substantially.
Serve over pasta.
Meatballs
½ lb. ground beef
½ lb. ground veal
1/3 cup breadcrumbs
¼ cup grated parmesan cheese
4 cloves garlic
1 egg
2 tbsp heavy cream
1 ½ tsp kosher salt
1 tsp dried oregano
1 tsp red pepper flake
1 tsp ground black pepper
½ tsp fennel seeds
½ tsp finely chopped fresh rosemary leaves
Peel, trim, and micro plane the garlic.
Beat the egg and cream together.
Add all ingredients to a bowl and mix well, ensuring that the mixture is regular, and that no large clumps of any ingredient remain.
Allow to rest in the refrigerator for 30 minutes.
Form into 1 ½ to 2-inch balls, and either sear in a pan, or poach in stock or salted water. (I often poach meatballs as it helps them retain a round shape.)
Soak Your Pasta
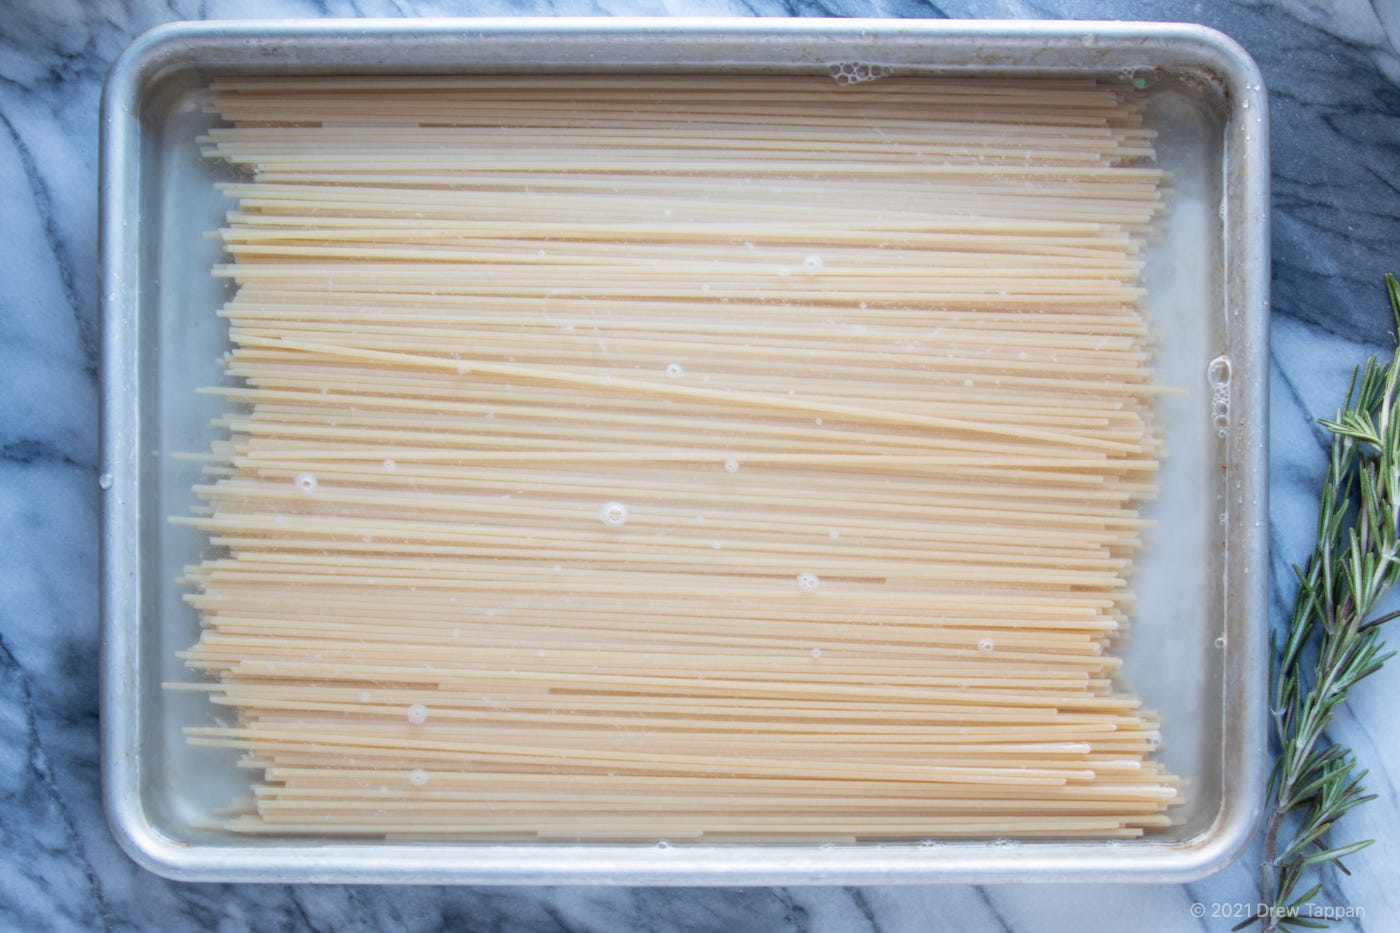
This is not a recipe. This is a technique – and not even much of one at that. Try soaking your dry pasta before cooking.
No. Really.
I honestly don’t know what made me decide to try this – I don’t actually remember reading about it anywhere (though I’m certain that this isn’t an original idea), but over the years I’ve found that soaking dry pasta for up to an hour before cooking yields a product that tastes – and has texture – that’s a lot closer to fresh made pasta than if you boil it straight from the box. That’s great if like me, you don’t own a pasta extruder (the press and die machines that are used to make round or tubular and fancy shaped pastas).
For long pasta, such as spaghetti, linguini, fettuccini, and the now apparently unobtainable bucatini, arrange the dry pasta on a ¼ sheet pan and just barely cover with water. Allow it to soak for 1 hour.
After an hour, prepare a pot of salted boiling water and cook the pasta.
It will cook much faster (usually about half the directed cooking time on the package) and it doesn’t require as large a pot (because the pasta is already soft and can curl into a pot), doesn’t require as much water (because it’s already hydrated), and will feel more evenly cooked (no more starchy center because … science or something).
In my experience, this works well for most pasta shapes, though I find the difference most pronounced in long thin pastas.
Lemon Mousse

Every week I tell you how I struggle with desserts. I’m not a pastry cook. For me, desserts are often afterthoughts – which I suppose is appropriate for something that comes after dinner. I like something sweet or flavorful to finish a meal, a marker that that part of the experience is over - but sometimes I happy with a brandy, a glass of rum, a piece of candy or a cookie. I’ll probably never feature a really intricate dessert here because … that’s not the way I cook.
For this week, I wanted something that really matched the rustic excess of the red sauce meal. Old school, red-checked tablecloth American restaurant traditions say that should probably be one of a few choices: Spumoni or Neapolitan ice cream, tiramisu, or maybe ricotta pie. I’ve already done a ricotta pie for this newsletter. I’ve already talked about making ice cream.
This week, I’ve got a huge pile of lemons. So, lemon mousse it is. This mouse comes together pretty quickly, and if I’m honest, you could swap out making your own lemon custard for a jar of store-bought lemon curd (though it may not be as bright in flavor). It’s little more than gelatin-stabilized whipped cream folded with sweet, bright lemon curd – but it’s refreshing, delicious, and feels way fancier than it should. And that’s a good thing.
Makes 4 servings
2 egg yolks
½ cup plus 2 tbsp granulated sugar
4 tbsp butter
2 medium lemons
1 cup whipping cream
1 tsp or equivalent of unflavored gelatin
2 tbsp cold water
Zest the lemons into a non-reactive bowl (glass or stainless steel).
Add the sugar and stir well.
Allow to rest 15-30 minutes for the sugar to draw the oils from the zest.
Squeeze the juice from the lemon hulls and add to sugar and lemon mixture.
Add the egg yolks and beat to combine.
Cook this mixture in the top of a double boiler, or in a stainless-steel bowl set over a pan of simmering water, until the mixture is thick and easily coats the back of a spoon.
Cut the cold butter into small cubes and whisk into the cooked egg/lemon mixture while still hot.
While still warm, use a silicone spatula to press the entire mixture through a fine sieve or strainer to remove the zest.
Transfer to a container, and cover with plastic wrap, pressing the wrap onto the surface of the curd (this prevents a skin from forming or condensation from dripping onto the curd).
Refrigerate until cool – at least 2 hours.
Once the mixture is cool …
Add the cold water to a small bowl.
Sprinkle the gelatin onto the surface and allow to “bloom.”
Add the gelatin, water, and 2 tbsp of sugar to a pan and cook over low heat just until the gelatin and sugar have dissolved.
Set aside to cool to room temperature.
Add the whipping cream to the bowl of a stand mixer or a bowl large enough to accommodate a handheld mixer.
Whisk/process with a whisk attachment until stiff peaks have formed.
With the whisk working, slowly drizzle the gelatin syrup into the whipped cream.
Remove from the mixer, and fold the lemon/egg mixture into to the whipped cream.
Pipe into wine glasses, coupe, or other serving dish and refrigerate until ready to serve.
Garnish with fresh lemon zest and mint leaves.