
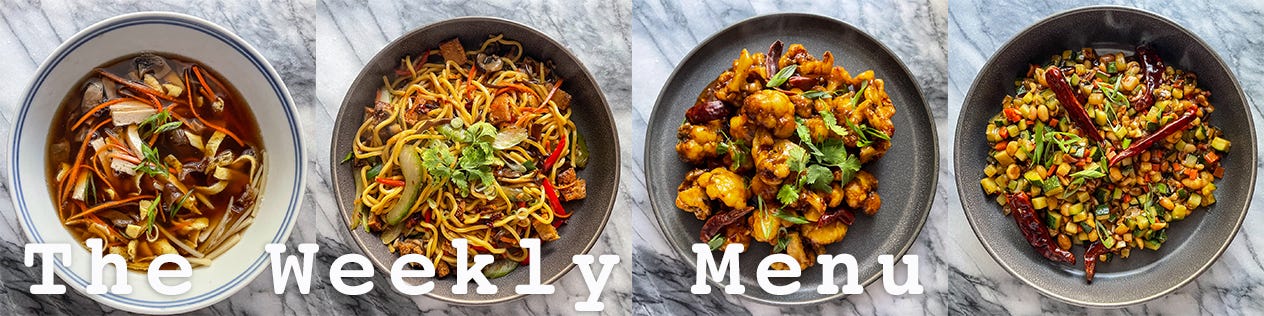
Take Away
Eat your veggies.

Before I get to this week's menu, I wanted to share a quick announcement. I’m working with some friends who just launched Fond, a new cooking app that is designed to fix a lot of what's frustrating about following recipes on your phone.

As part of this partnership, Fond will offer subscription access to the full catalog of my Chicken Thigh Guy recipes (and eventually recipes from The Weekly Menu as well) through the app. Subscribing through the link below supports me and my work (and you get early access to a very cool app that makes it easy to follow and cook my recipes at home).
https://partners.getfond.com/blogs/chicken-thigh-guy
Fond is a new iPhone/iPad app that helps support recipe creators by allowing fans subscription access to content through the unique "Recipe Stream" format. The Recipe Stream makes cooking from your iPhone or iPad super simple, with built-in timers, no scrolling and everything you need visible in the moment. For questions or support, please reach out to help@getfond.com
This is the third time I’ve started this week’s newsletter. The first time was about five weeks ago, when I first (at least with the intent of including them in a menu) cooked some of the dishes you’ll find here. They needed some work, so I decided to delay and try again. I made changes, re-cooked the dishes, and photographed it all last week, but I didn’t start writing again.
The second time was yesterday morning, when after a sort of insane week, I finally collected my notes, collected my thoughts, and set about writing out the recipes and commentary and associated smart-sassery you’ve become accustomed to if you’re a regular reader.
The third time I started writing this week’s newsletter was this morning. Because yesterday afternoon somewhere between near being trapped in an avalanche of poorly stacked dishes, accidentally emptying a half-full bag of frozen peas all over the kitchen floor, and stubbing my toe on – of all things – a shoe, I apparently deleted all my work. I could cry and complain and … well, truth be told, I’d spent most of the day procrastinating, working on what may become The Chicken Thigh Guy cookbook, and procrastinating some more. Sometimes being a food bum is a lot of work.
It was all worth it because this week’s menu is a lot of fun - at least for me.
From special once-a-year family feasts in Toronto’s Chinatown, to dining hall escapes in college, to Christmas Eve with interfaith family, to cold nights hunkered in front of the fire in DC, the unique cuisine developed in the US and Canada by immigrants from China has always been a big part of my culinary and cultural education. Meals that have marked holidays and victories, sad nights alone, and something to fall back on when cooking was just too much.
These days, we’re trying (rather unsuccessfully because I’m a huge carnivore) to eat less meat. We also don’t drive and have somehow arrived in a city without an intricate web of Chinese takeout joints situated every few blocks. That’s not so say there isn’t good Chinese food here in Columbus, there are some great options from several different regions as well as some great American style Chinese restaurants – they’re just not down the block. Those two factors have led me to play about even more with cooking some of the dishes from those cuisines – and this menu is the result of that. It’s not authentic Chinese food – I can’t begin to do justice to the traditions and ingredients of China’s many cultures and cuisines. It’s not even authentic Chinese American food because again, I can’t begin to claim knowledge or – really anything – from that amazing and diverse tradition. What it is, is me, fascinated by food that became part of my life, playing about in the kitchen and hopefully sharing that with you. Eat your vegetables … and know that they’re way better deep fried and covered in a delicious sauce.
Meatless Hot and Sour Soup

The first time I ever had hot and sour soup was sometime in the very early 1980s at a Chinese restaurant on the second floor of a row of shops in Toronto’s Chinatown. Every summer, on our way back from weeks in Northern Ontario we’d spend a couple days in Toronto visiting family and (since we lived in a small, mostly rural Ohio town at the time) generally playing at being in a big city. We’d order a lot of different dishes for our family of five, but we always started with soup: a big bowl of egg drop to share between the three kids and my mom and a single serving of Hot and Sour for my dad. I of course had to try it. It was hot. It was sour. I’m pretty sure I hated it, but then again I was probably 7 years old and was still kind of freaked out by the “thousand year old eggs” and the crabs escaping down the sidewalk from the shops downstairs.
I’ve since come around. It’s one of my favorites now. Even in the heat of summer, any Chinese takeout order we place must include at least one serving of hot and sour soup. This recipe is a meatless version (though I do include egg). You can tweak the inclusions, as well as the amount of sour (by adding or omitting some of the vinegar) and the hot by changing the amount of white pepper. The fresher the white pepper, the spicier it will be. Pre ground won’t be nearly as potent.
1 medium white or yellow onion
1 medium carrot
1 2-inch piece of fresh ginger
¼ pound firm tofu
8 button mushrooms
4 green onions
2 cloves garlic
1 large piece dried wood ear or mushroom
1 large egg
¼ cup sliced bamboo shoots
1 tsp black rice vinegar
1 tbsp white rice vinegar
1 tbsp soy sauce
1 tsp fresh ground white pepper
2 tsp corn starch
Peel, trim, and half the onion.
Using the sharp edge of a spoon, peel the ginger, then slice 2/3 of it into 1/8-inch-thick disks – reserving the rest for a later step.
Place the onion halves and ginger slices in a dry pan – cut sides down – over medium high heat.
Cook until the onion is beginning to char.
Trim, and cut 2 of the green onions into 4-inch pieces.
Add the onions to the pan.
Add 4 cups of cold water to the pan. It will sputter and spit.
Clean, and quarter 4 of the button mushrooms and add to the pan.
Bring to a simmer and cook for at least 30 minutes.
Soak the wood ear mushroom in boiling water for 15 minutes, then slice into thin strips.
Peel, trim, and julienne the carrot.
Peel, trim, and finely mince the garlic.
Finely mince the remaining ginger.
Clean, and thinly slice the remaining button mushrooms.
Trim and thinly slice the remaining two green onions.
Wisk the egg with 1 tsp water and pour into an oiled or nonstick pan over medium heat, swirling to coat evenly.
Allow the egg to cook until just firm, then turn out and cut into thin strips.
Cut the tofu into ¼ inch batons.
Cut the bamboo shoots into thin matchsticks.
Strain the broth, discarding the solids.
Season the broth with both vinegars, soy sauce and white pepper.
Taste for seasoning and add additional salt if needed.
Add the 2 tsp cornstarch to 1 tbsp cold water, and whisk into the broth.
Add the ginger, garlic, both mushroom types, bamboo shoots, carrot, and tofu to the pot and return to a simmer.
Add the sliced egg and sliced green onion – reserving some onion for garnish.
Serve hot.
Zucchini Kung Pao
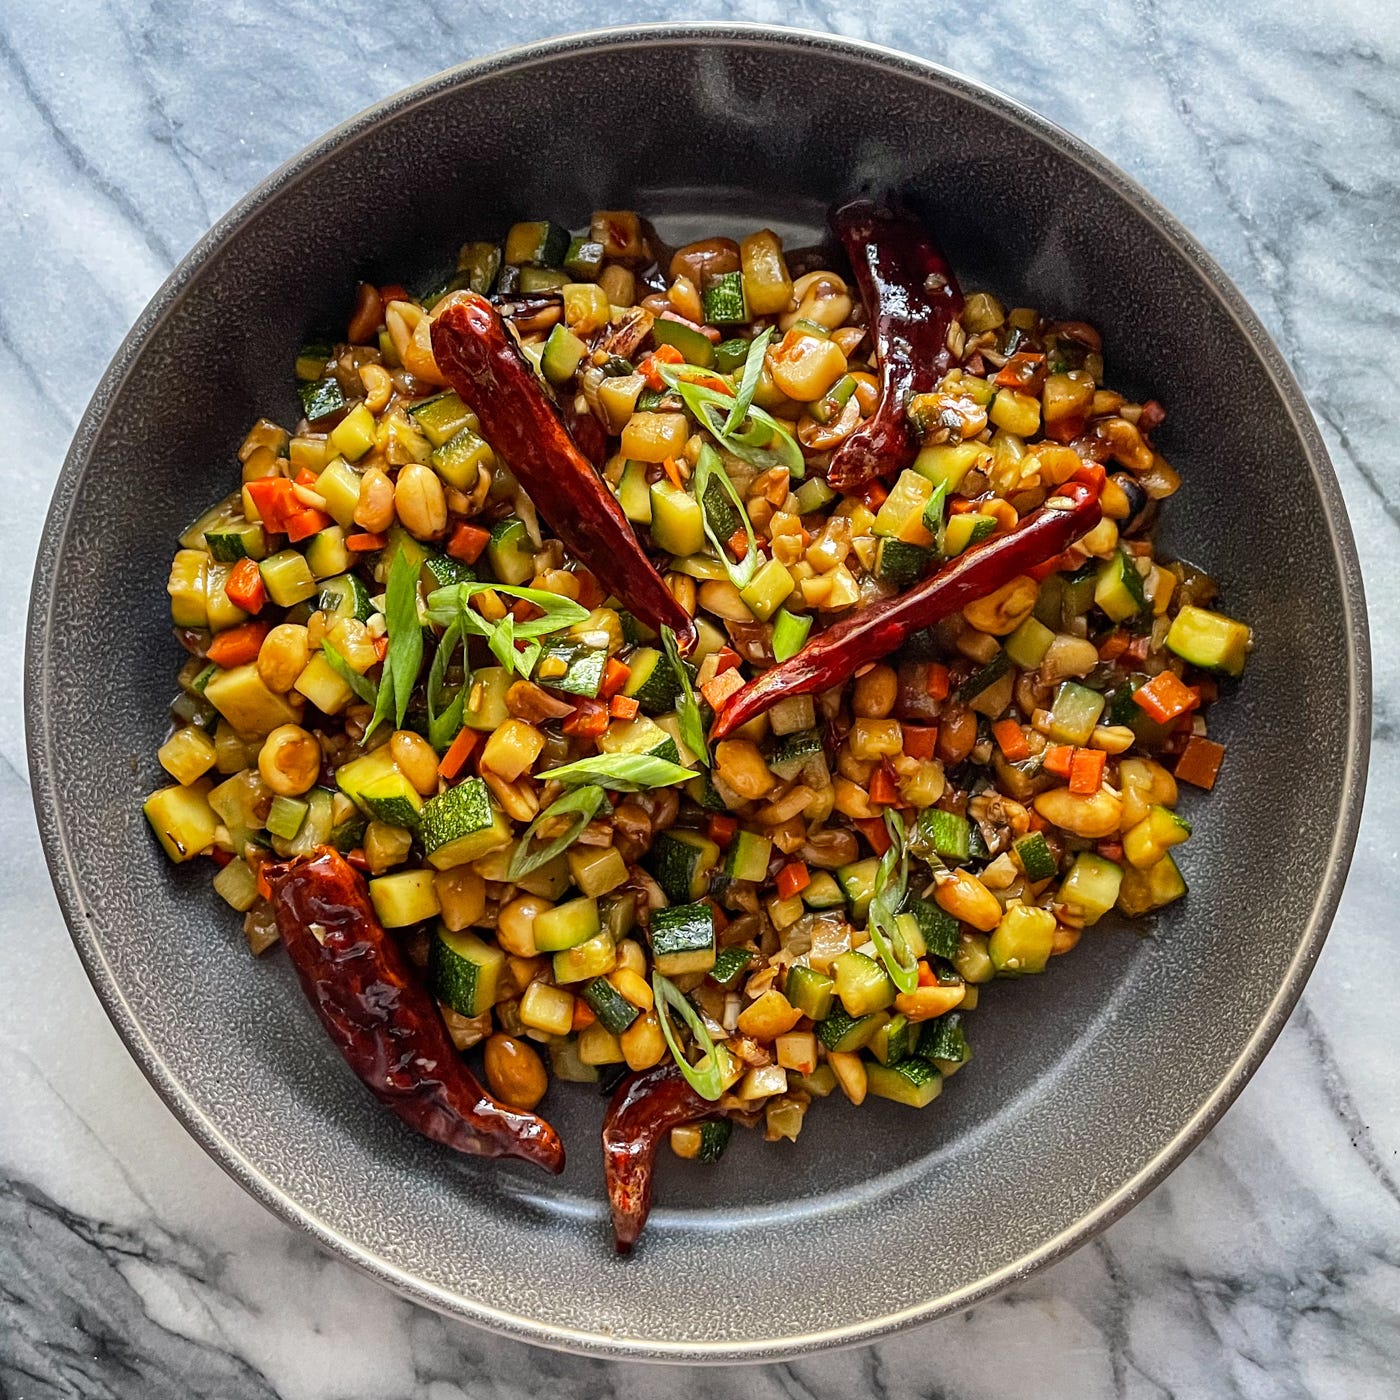
Zucchini (that’s courgette or marrow for those of you who speak one of those other Englishes) is one of those weird vegetables that you’re excited for before the season starts (even though it’s available all year these days) and that you’re usually completely bored of by about the second week of that (sort of pretend) season. That means we find all sorts of weird things to do with it. Stuff it, bake it, make it into break or muffins, or chocolate cake.
Here, I’m basically swapping it in for chicken. That happens in a lot of recipes, some more successfully than other. In this case, it’s pretty successful. The squash absorbs the flavors well, and the combination of textures both mimics and in some cases is better than the chicken versions.
2 medium zucchinis
1 small carrot
1 stalk celery
1 8 oz can sliced water chestnuts
¼ cup roasted peanuts
2 cloves garlic
1 tsp minced ginger
1 green onion
1 tsp chili bean sauce
2 tsp soy sauce
½ tsp toasted sesame oil
1 tsp neutral oil
1 tsp red chili flake (opt)
Dried chilis for garnish
Peel, trim, and mince the garlic.
Trim the ends from the zucchinis, and dice into ¼ inch pieces.
Peel, trim, and dice the carrot into ¼ inch pieces
Drain the water chestnuts and dice into ¼ inch pieces.
Trim the celery and chop into ¼ inch pieces.
Trim the root end from the green onion, then slice thinly – separating the green and white portions.
Mix the soy sauce, bean sauce, and sesame oil.
Add the neutral oil to a pan over high heat.
Add the garlic, the white portion of the green onion, chili flake (if using), and ginger to the oil.
Cook, stirring constantly, until the mixture is fragrant.
Add the carrots, celery, zucchini, water chestnuts, and peanuts to the pan, and cook until the zucchini is just tender.
Add the soy and bean sauce mixture, toss to coat, and cook until most of the liquid is absorbed or evaporated.
Garnish with the sliced green onion and dried chilis. Serve with steamed rice.
Eggplant with Black Bean and Garlic Sauce
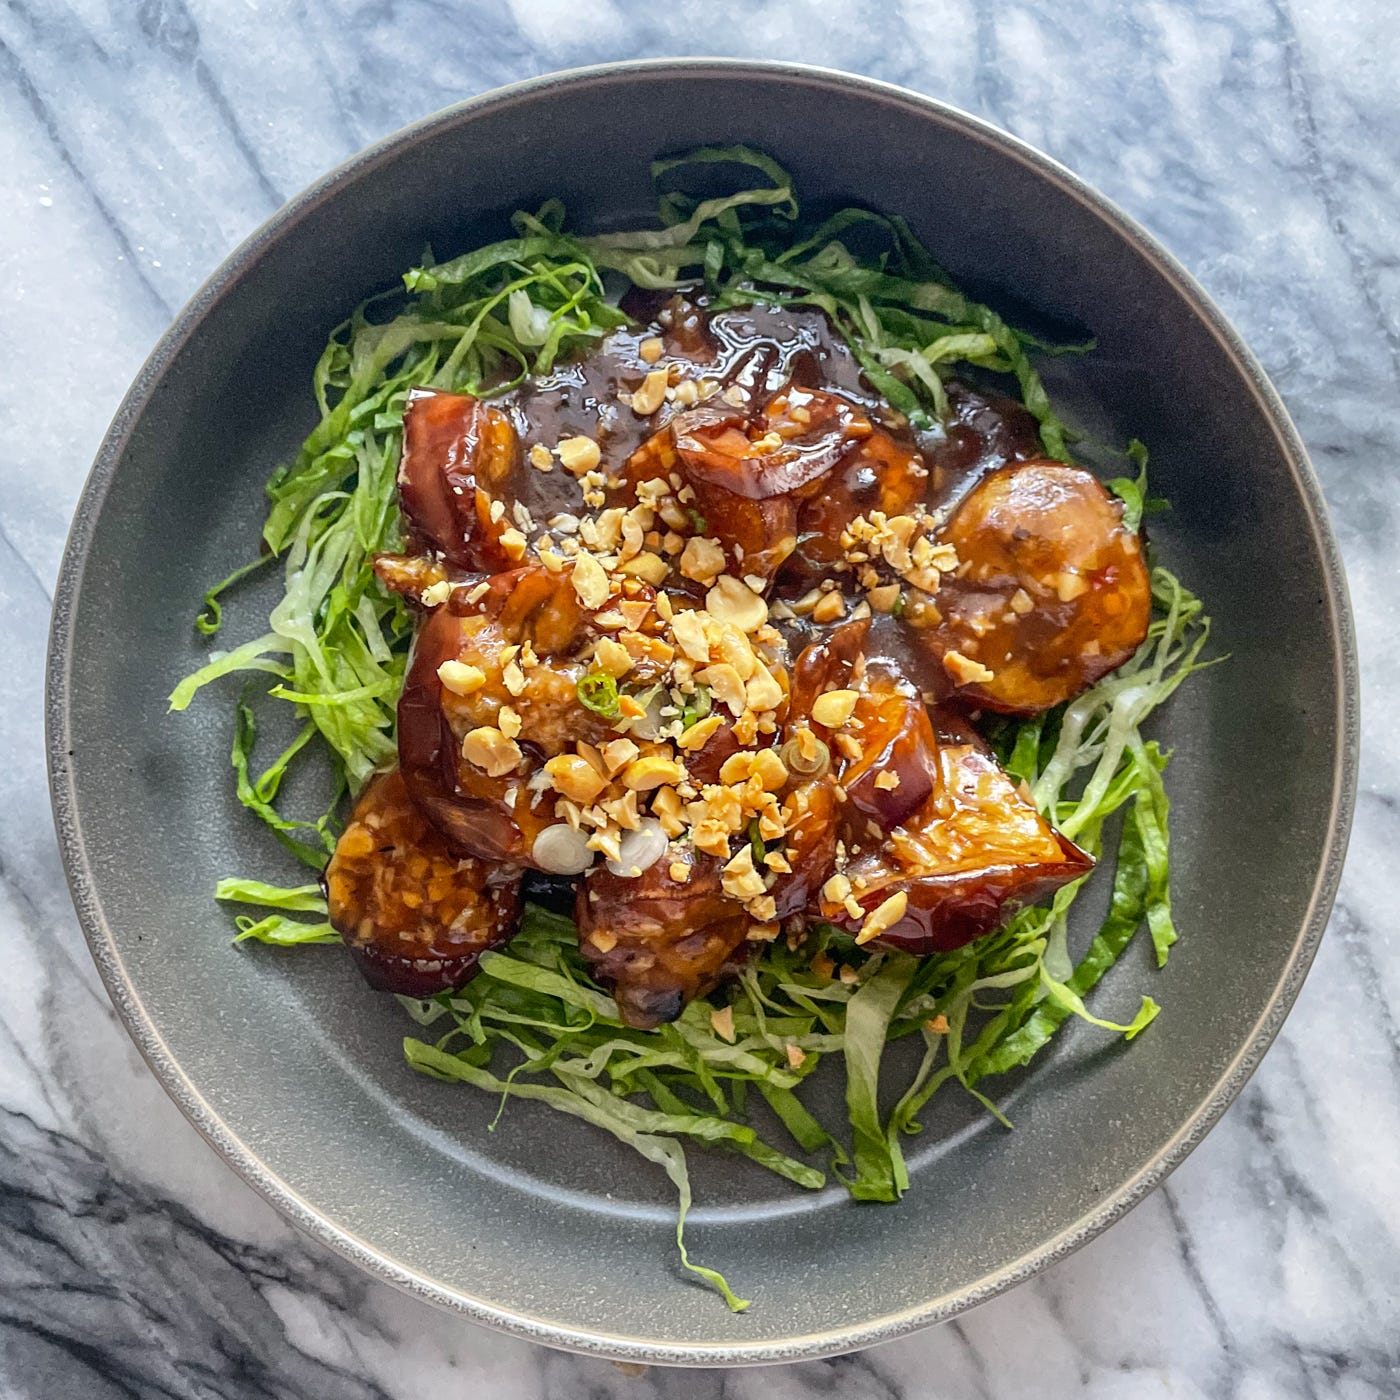
Like all the other dishes in this week’s menu, there’s likely nothing remotely traditional about this eggplant recipe. Eggplant with garlic sauce is one of our takeout standards – but the dish is different almost every place we order from. This is my version of a particular takeout place’s rather unusual eggplant dish – it’s a little sweeter and less salty than some and, unusually, it comes layered on top of a bed of shredded lettuce that ends up as more than just a garnish and adds a lot of flavor and texture to the dish.
Even though I specify Chinese or Japanese eggplant, you can make it with more available Italian style eggplant – although it’ll be a little mushier because of the difference in skin to flesh ratio.
2 Chinese or Japanese (long slender) eggplant
4 cloves garlic
1 green onion
¼ cup water
2 tbsp plus 1 tsp neutral oil
1 tbsp crushed roasted peanuts
1 tsp minced ginger
1 tsp fermented black bean paste
1 tsp chili garlic paste
2 tsp soy sauce
2 tsp corn starch
1 tsp granulated sugar
½ tsp toasted sesame oil
½ head iceberg or romaine lettuce
Trim the eggplant, discarding the stem and blossom ends.
Cut the eggplant into 2 inch pieces.
Add 2 tbsp of neutral oil to a pan over medium high heat.
Cook the eggplant, stirring or tossing frequently, until lightly browned on the cut faces. Remove from the pan and set aside.
Peel, trim, and mince the garlic.
Trim and thinly slice the white portion of the green onion. Reserve the green tops for garnish.
Mix the black bean paste, chili paste, soy sauce, sesame oil, sugar, corn starch, and water in a non-reactive bowl.
Add 1 tsp of neutral oil to a pan.
Add the garlic, white portions of the green onion, and ginger and cook just until fragrant.
Return the eggplant to the pan, along with the sauce mixture, and simmer until the sauce is thickened and the eggplant is soft.
Serve over shredded iceberg lettuce and top with finely chopped peanuts.
Serve with steamed rice.
Vegetable Lo Mein with Crispy Tofu
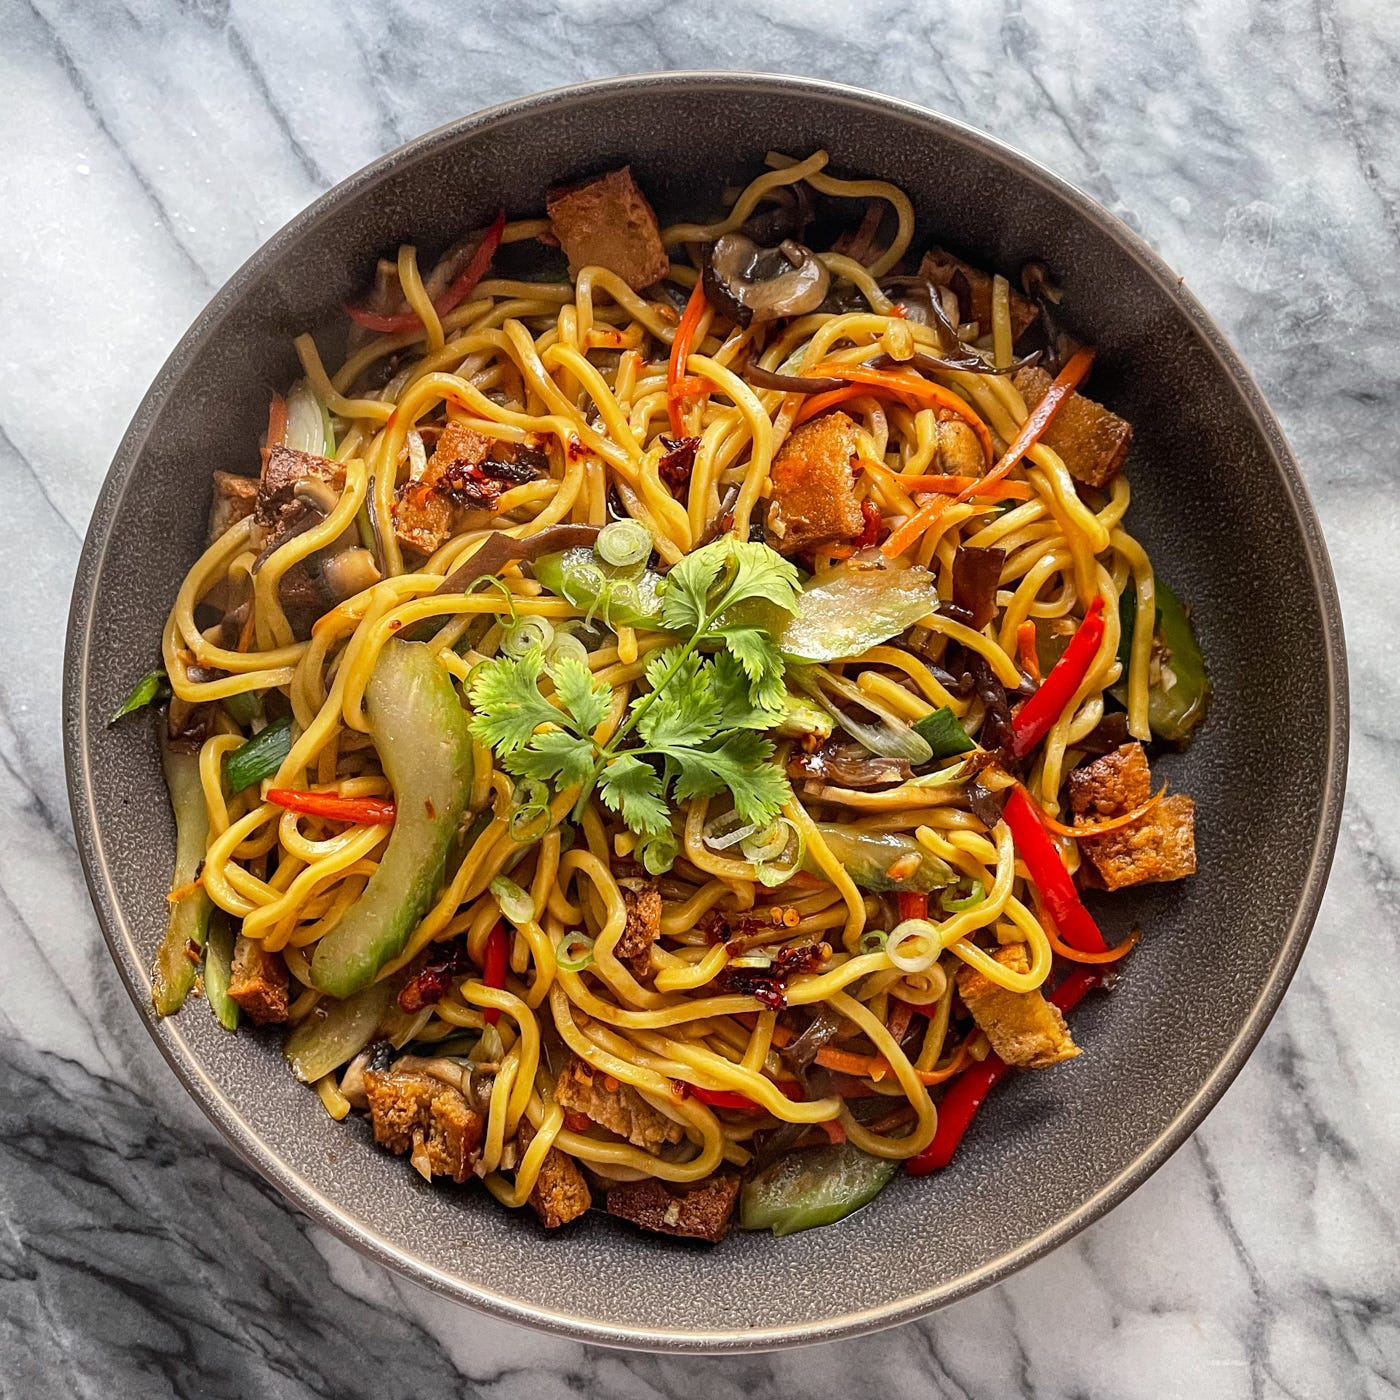
I’m a sucker for just about any noodle dish from just about any cuisine, but I’ve got a soft spot for American Chinese takeout style lo-mein. When I was younger and poorer, it was a great way to pack in a lot of calories for the cash; it could last for a few days in the fridge and it tasted a lot better than instant ramen. My usual order then (and now) includes roast pork, but this veggie version still hits all the right notes.
If you’re luckily like we are and have access to a good international market, you can probably find fresh bright yellow lo mein noodles. If not, the grocery store brand “fresh Chinese noodles” will do. You can even get by with spaghetti or other dried long noodles. Breaking the dried pasta in half and cooking it with ½ tsp of baking soda in the water will help approximate the texture and flavor of the fresh noodles.
1 package fresh lo mein or Chinese style noodles
1 medium carrot
1 stalk celery
1 red pepper
1 medium white onion
¼ lb firm tofu
4 button mushrooms
2 green onions
2 cloves garlic
¼ cup plus 1 tsp neutral oil (soy, peanut, grapeseed, or canola)
1 tsp minced ginger
1 tbsp oyster sauce
1 tsp soy sauce
½ tsp sesame oil
Slice the tofu into ¼ inch thick strips.
Place the strips between layers of paper towels or a folded clean kitchen towel and press, or weigh down, to squeeze out as much moisture as possible.
Peel, trim, and julienne the carrot.
Trim, and slice the celery.
Stem, seed, and julienne the red pepper.
Peel, trim, and slice the onion lengthwise (end to end instead of across).
Trim and thinly slice the green onion.
Peel, trim, and mince the garlic.
Clean and slice the mushrooms
In a small, non-reactive bowl, mix the soy sauce, oyster sauce, and sesame oil.
Prepare the noodles according to the package directions.
Add 1 tsp neutral oil to a pan over high heat.
Add the garlic, ginger, and the white portion of the green onions.
Cook, stirring constantly, until the mixture is fragrant.
Add the carrots, red pepper, celery, onions, and mushrooms and cook over high heat – stirring occasionally until the carrot is just softened. Allowing the mixture to sit undisturbed for a few minutes after the first stir or shake will add a bit of char or color that adds a lot of flavor.
Add the noodles, sauce mixture, and crisp tofu. Toss well to coat and to heat the noodles through.
Serve immediately.
General’s Cauliflower

My single favorite Chinese takeout dish is and probably always will be some variation of the dish called some variation of General Tso’s Chicken. There are a thousand variations. Different styles, different stories of the dish’s origin (though they pretty much all agree it’s Chinese American and not at all old.) I like sweet and sour and fried and spicey, so of course it’s what I crave when I’m too tired or sad or lazy to cook, or when I walk past a takeout joint and that wonderful hunger-inducing smell of what’s certainly aerosolized fry oil comes wafting past. I know it sounds gross when I write it out like that, but you know you’ve smelled it and you know it’s made you hungry.
Cauliflower is a great stand in for chicken or fish when it comes to fried preparations – but like fish it has a very high moisture content, so you’ve got to get it from fryer to plate quickly to avoid it becoming soggy. I use corn starch in the breading here to help mitigate some of that and keep it crunchy – but speed is still of the essence.
Crispy Cauliflower
1 head white cauliflower
½ cup corn starch
½ cup all purpose flour
½ tsp baking powder
1 egg
Oil for deep frying
Whisk the egg well with 1 tbsp of cold water.
Mix the all purpose flour, corn starch, and baking powder well.
Trim the cauliflower, removing and discarding all green parts and the thick stem.
Cut the florets into 1-2 inch pieces.
Toss the florets well in the egg mixture, ensuring a thin coat over all florets.
Toss the egg coated cauliflower in the breading mixture, allowing it to rest for 5-10 minutes before tossing again.
Fry in 350°F oil until crisp and beginning to brown.
Toss with sauce (below) and serve immediately with steamed rice.
Sauce
¼ cup water
1 tbsp dried red chili flake
1 tbsp ketchup
1 tbsp soy sauce
2 tbsp rice vinegar
2 tsp minced garlic
1 tsp minced ginger
1 green onion
¼ cup granulated sugar
1 tsp cornstarch
2 tbsp water
1 tsp sesame oil
Dried Chilies (optional)
Trim and slice the green onion, separating the white and green portions and discarding the root end. Reserve the green portion for garnish.
Add 1 tsp sesame oil to a shallow pan over medium heat.
Add garlic, ginger, the white portion of the green onion, and the chili flake to the pan, and sauté for about 2 minutes or until the entire mixture becomes fragrant.
Add the soy, water, vinegar, and ketchup. Simmer for about 20 minutes.
Mix 2 tbsp water and 1 tsp cornstarch. Add to the simmering sauce and return to a low boil to thicken slightly.
Transfer the thickened sauce to a large bowl and toss well with fried cauliflower and serve immediately.