


There’s no real newsletter this week. I had planned to share a menu of South Asian inspired small plates - but I sort of never got that completely together -though I did get to share the in-development dishes with a few friends last weekend. I may rebuild that next week, or you may see something altogether different.
The main reason that I never quite got it together - I mean other than my inherent lack of disorganization, the high probability that I’d get distracted by some other project, a loud noise, or a squirrel in the yard - is that i’ve spent a lot of the last week preparing for a benefit dinner I’m cooking in the Maryland suburbs near Washington D.C. this weekend. It’s going to be great fun (and there are still a few slots left, if you’re interested drop me a line) but planning a meal for dozens of people from 400 miles away presents some unique challenges.
All the more so because the meal’s being served in a barn. On a farm.
Specifically, my friend Marc’s farm. I met Marc more than 30 years ago - when my family moved in next door to his. In the years since, he’s done some remarkable things, but perhaps none more remarkable than building a thriving organic farm on the outskirts of Washington D.C. The meal we’re cooking with the help of the team at The Farm at Our House this weekend shows off the produce of that remarkable endeavor, and celebrates the work he and his remarkable team have done there. In addition, this dinner serves as a benefit for the organization that owns the land on which the farm works - a residence for at-risk teens that helps them prepare for life as adults. Again, drop me a line if you’re in the DC area and are interested in joining.
So … My dining room table is currently covered in kitchen equipment and tools i’m hauling to Maryland, and The Weekly Menu will return next week with an actual new menu. In the meantime, here's a look back at some of the years most popular items - which is appropriate because I completely missed the two year anniversary of this thing a couple weeks ago.
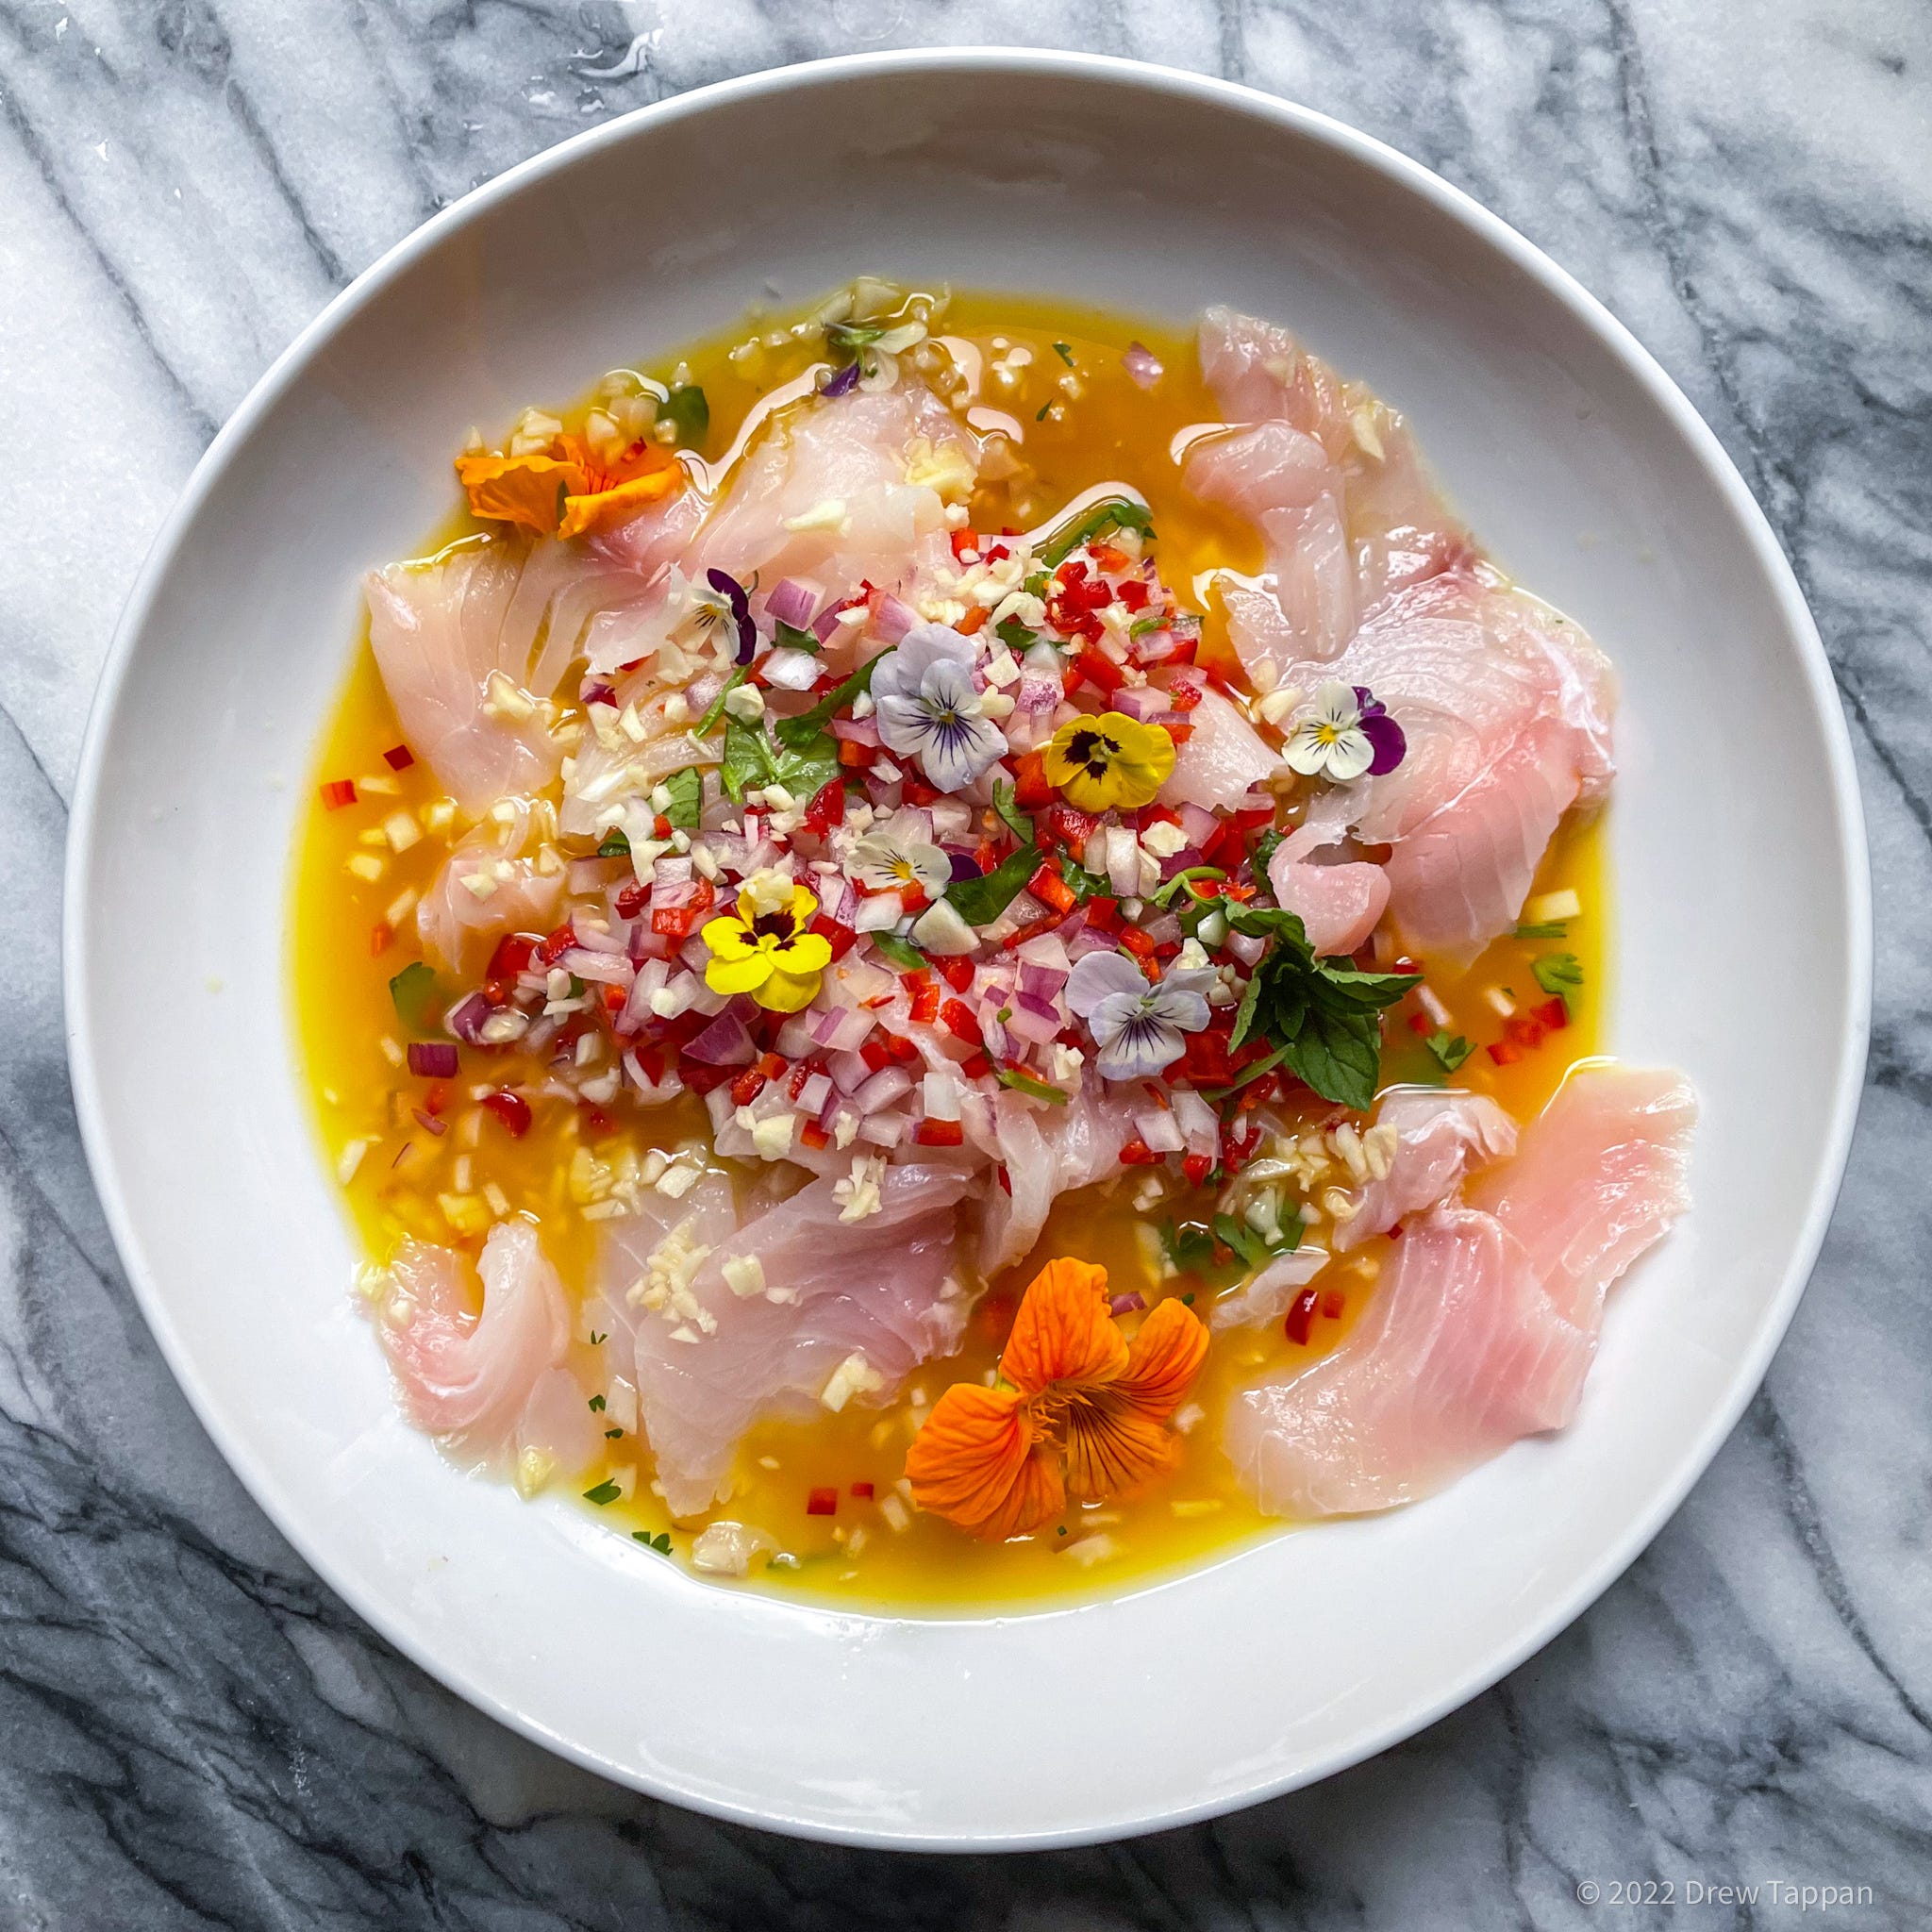
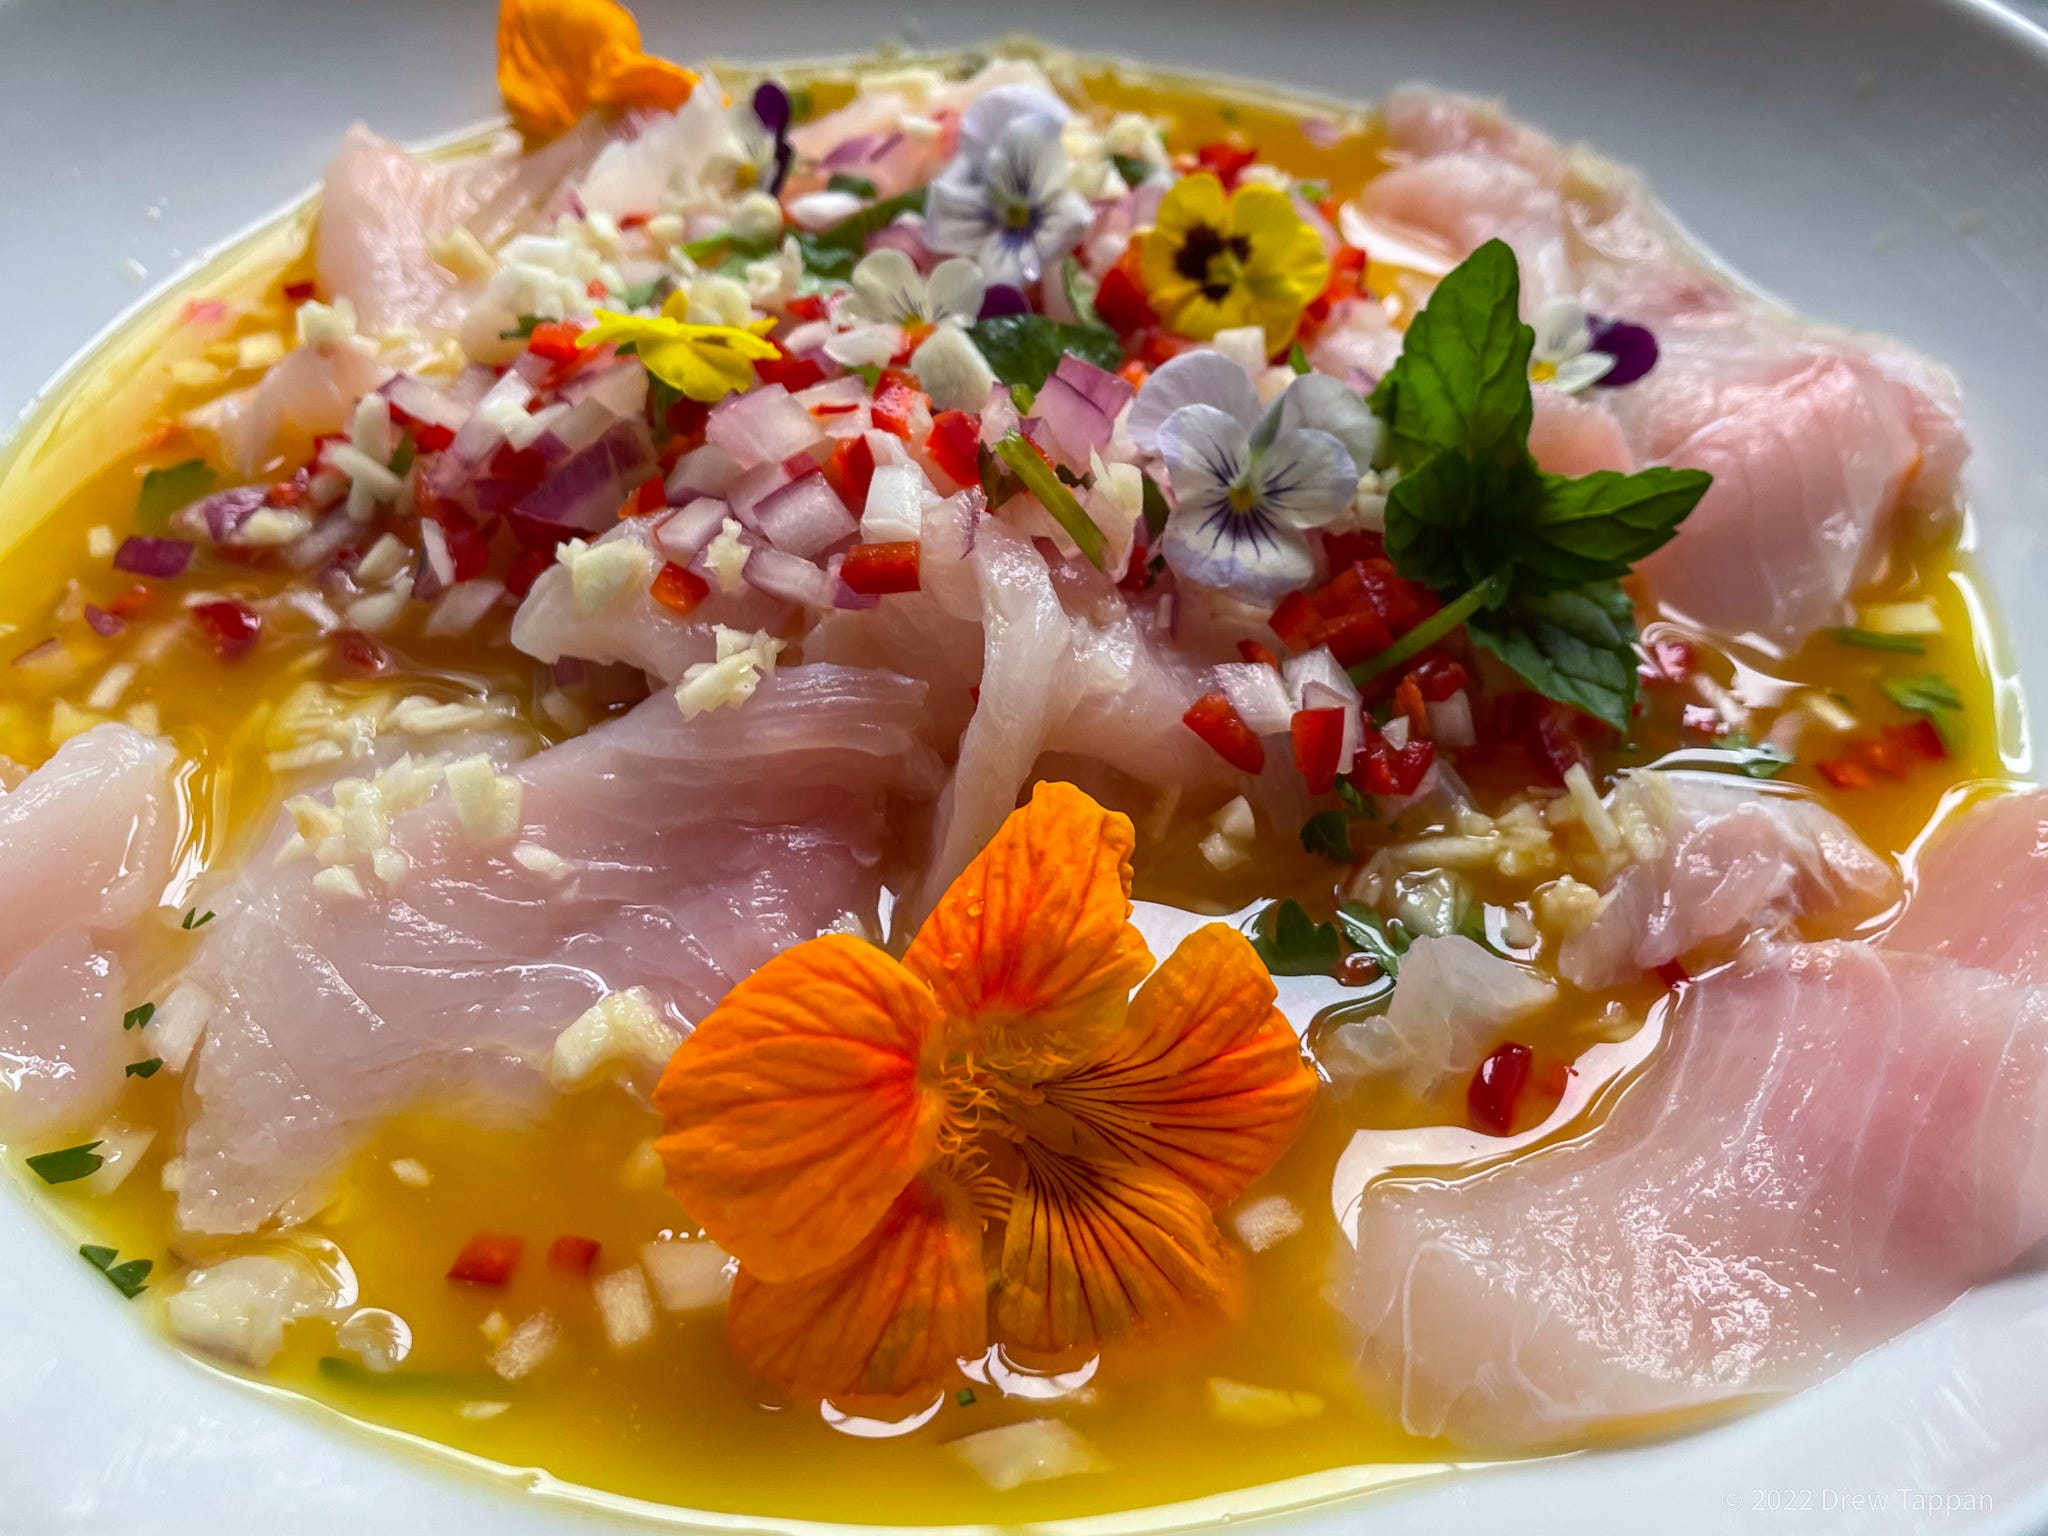
Yellow Pepper Ceviche
Note: This dish originally appeared in “Yellow” from June 22nd of this year.
Ceviche are perfect summer dishes because … well, really because they’re cold. But also because they’re a way for people who’re maybe not completely totally comfortable with raw seafood to enjoy raw seafood. The acid in the marinade partially “cooks” the fish – so if you’re a little squidgy about the raw part you can tell yourself it’s not raw.
It’s raw. Really. The “cooks” is in quotes because it doesn’t cook it. It does break down some portioned in a way similar to cooking, but it’s not really cooking. But don’t be afraid if it for that reason. Be afraid of it because unless you’re making it yourself, or you’re you know – in the Midwest where mayonnaise is considered spicy – a real ceviche can be perfectly wonderfully face numbingly spicy.
Me, I like it that way. I recognize not everyone does. You can choose which sort of chili you want to use, and whether or not to include the seeds and ribs. Seeds and ribs carry most of the heat, so leaving them out will give you a much milder chili.
I use pureed yellow bell pepper as a base here because it’s easier and cheaper than Aji Amarillo (which I am using in one other recipe here this week) but also because it’s mild. That lets you customize the heat level yourself by using other peppers to build the spice profile.
Also, it’s really cool looking. It’s intensely bright yellow. And we all know looking cool matters.
1 lb fresh red snapper filet
1 large yellow bell pepper
1 hot pepper (serrano, red finger, fresno, jalapeno)
¼ cup fresh lime juice
2 tbsp finely minced red onion
1 tbsp finely minced cilantro
1 tsp kosher salt
1/4 tsp ground cumin
green onion, cilantro, edible flowers for garnish
Remove the stem and seeds from the yellow pepper and cut into 1 inch pieces.
Add the pepper and lime juice to the container of a high-speed blender, and process on high until very smooth.
Pour the resulting liquid through a fine strainer to remove any solids and reduce foaming.
Trim, and very finely dice the peppers. You may choose to remove the seeds and ribs (milder) or include them (spicier).
Add the diced chilis, red onion, minced cilantro, salt, and red onion to the pepper and lime mixture.
Cover tightly and refrigerate at least 1 hour.
Remove the skin from the fish by placing it skin side down on a cutting board, and gently running a long knife the length of the filet.
Discard the skin (or use to make fish stock for paella!) and cutting on the bias (diagonally) cut the filet into very thin slices.
5 minutes before serving pour a portion of the marinade into a bowl, add the fish, and pour the remaining liquid over the top.
Garnish with fresh herbs and edible flowers.
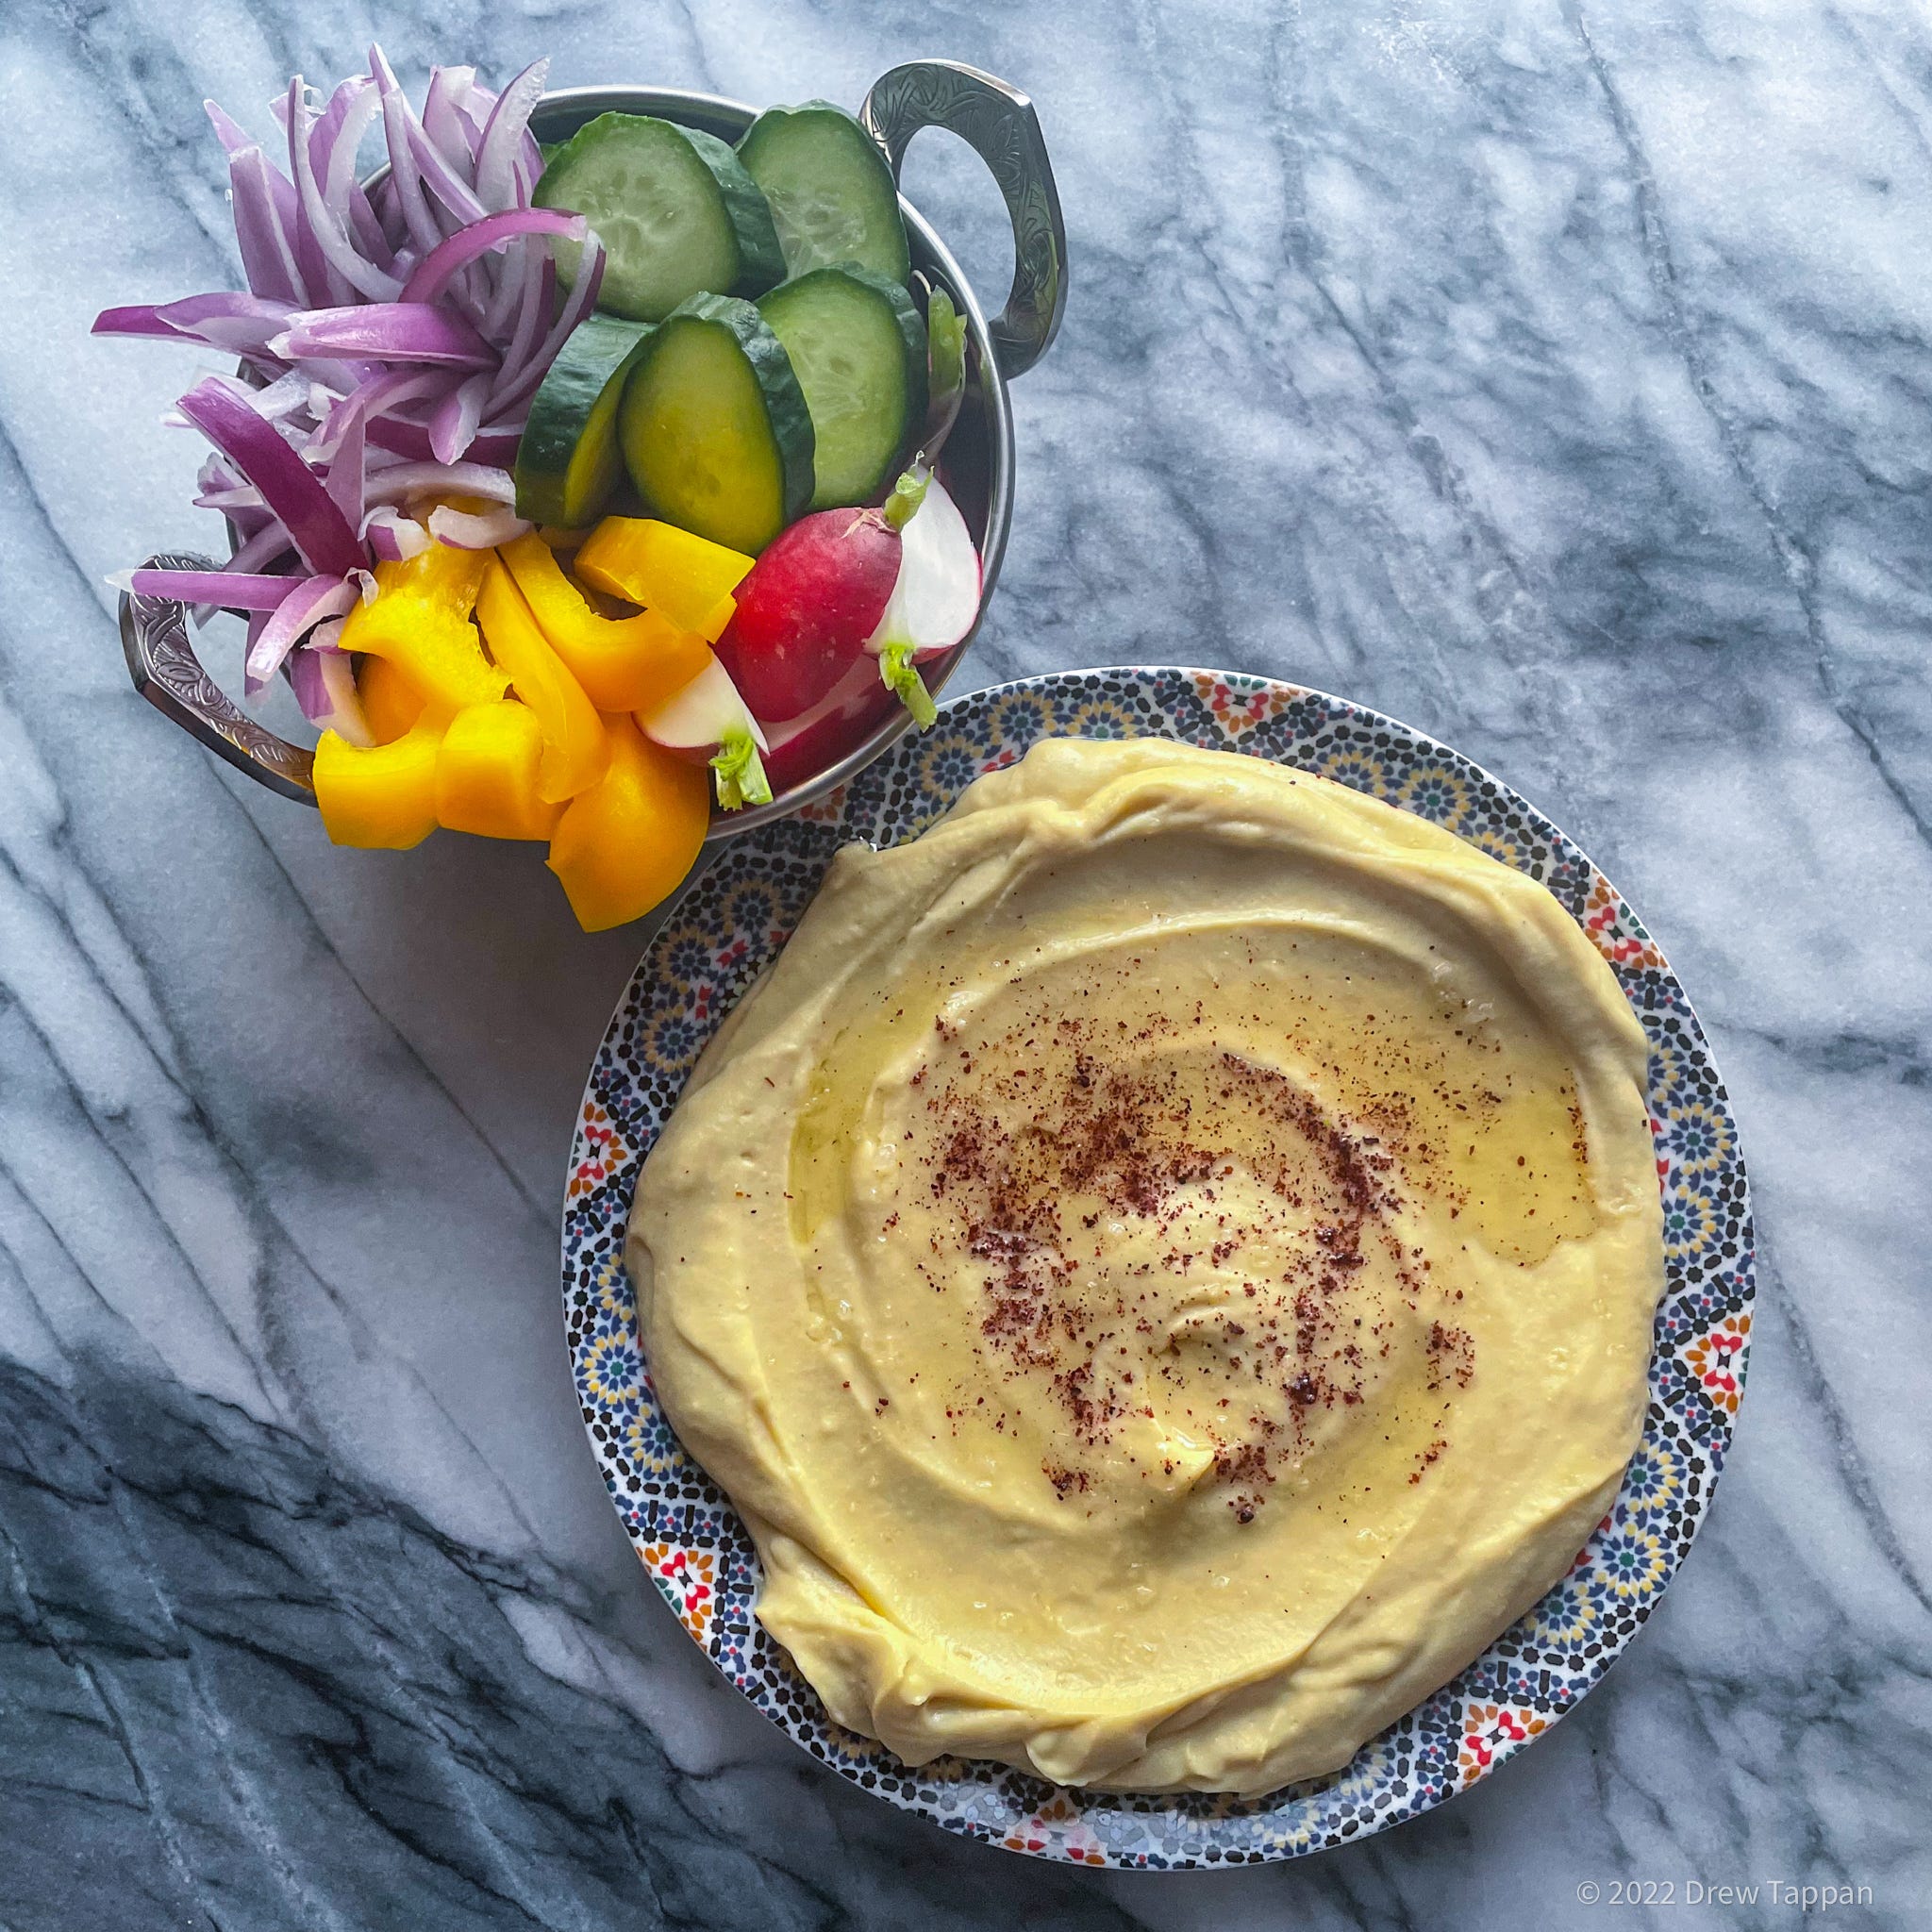
Hummus
Note: This recipe appeared in “Mini-terranean” from March of this year.
For the first 2/3rds of my life, hummus was something the hippies ate. Someone tried to sell it to me at a Dead show, or at the college co-op. It was a popular item at a café I worked at for a while in the 90’s – layered into “wraps” with bean sprouts and roasted red peppers on a green crumbly tortilla. That hummus was pretty much always made with canned chickpeas, and had a rough, thick masonry consistency – like a legume based mortar. You could have an adobe colored empire built with the stuff – but might be better off without eating it. And don’t even get me started on the other varieties of the stuff. Like those freeze pops you ate as kids, they were more other colors than other flavors. Purple. Green. Red. Sometimes it came with dry crumbly pita. More often, blue corn chips.
Then at some point, some place, someone set a plate of smooth, flavorful lovingly made well seasoned hummus in front of me. With real bread, hot from the oven or griddle. It didn’t taste like a can. It didn’t leave flecks of beanskin in your teeth.
It was good. I mean, really, really good.
I tried to reproduce it at home, but no extra time in the food processor or extra lemon juice made that can of beans into that luxuriously creamy dip.
Later, I learned the trick – either by reading about Michael Solomonov’s method (used at his Philadelphia restaurant Zahav) , or hearing it second hand. The short story: soak dried chickpeas in water, cook them with some flavorings, and process them while hot. The result is creamy, smooth, flavorful hummus. You can tweak the amount of lemon, olive oil, and tahini to your preference – as well as the texture (by varying the amount of liquid, or by thinning it later before serving) … the one unifying thing – you’ll need a blender. You can get close with a food processor, but a good high speed blender really does make all the difference.
1 cup of soaked dried chickpeas
4 cloves of garlic
2 tbsp tahini paste (more to taste)
2 tbsp lemon juice
2 tbsp olive oil
1 tsp kosher salt (more to taste)
1/4 tsp ground cumin
¼ tsp baking soda
1 bay leaf
Olive oil and sumac for garnish
Add the soaked chickpeas, bay leaf, baking soda, and 4 cups of water (or the soaking liquid) to a thick bottomed pot. Bring to a low boil and cook until the chickpeas are fall apart tender.
Peel, trim, and crush or microplane the garlic.
Combine the garlic and lemon juice and allow to rest for 15 minutes.
White the beans and cooking liquid are still hot, add the cooked chickpeas, tahini, lemon juice/garlic mixture, salt, cumin, and olive oil to the container of a high-speed blender along with a little cooking liquid.
Process until very smooth, adding hot cooking liquid as necessary.
Cool to room temperature.
To serve, whip vigorously with a whisk – adding a little water if necessary to thin the mixture (it will thicken as it cools)
Spread on a plate and top with olive oil and sumac.
Serve with flatbreads and/or sliced vegetables for dipping.
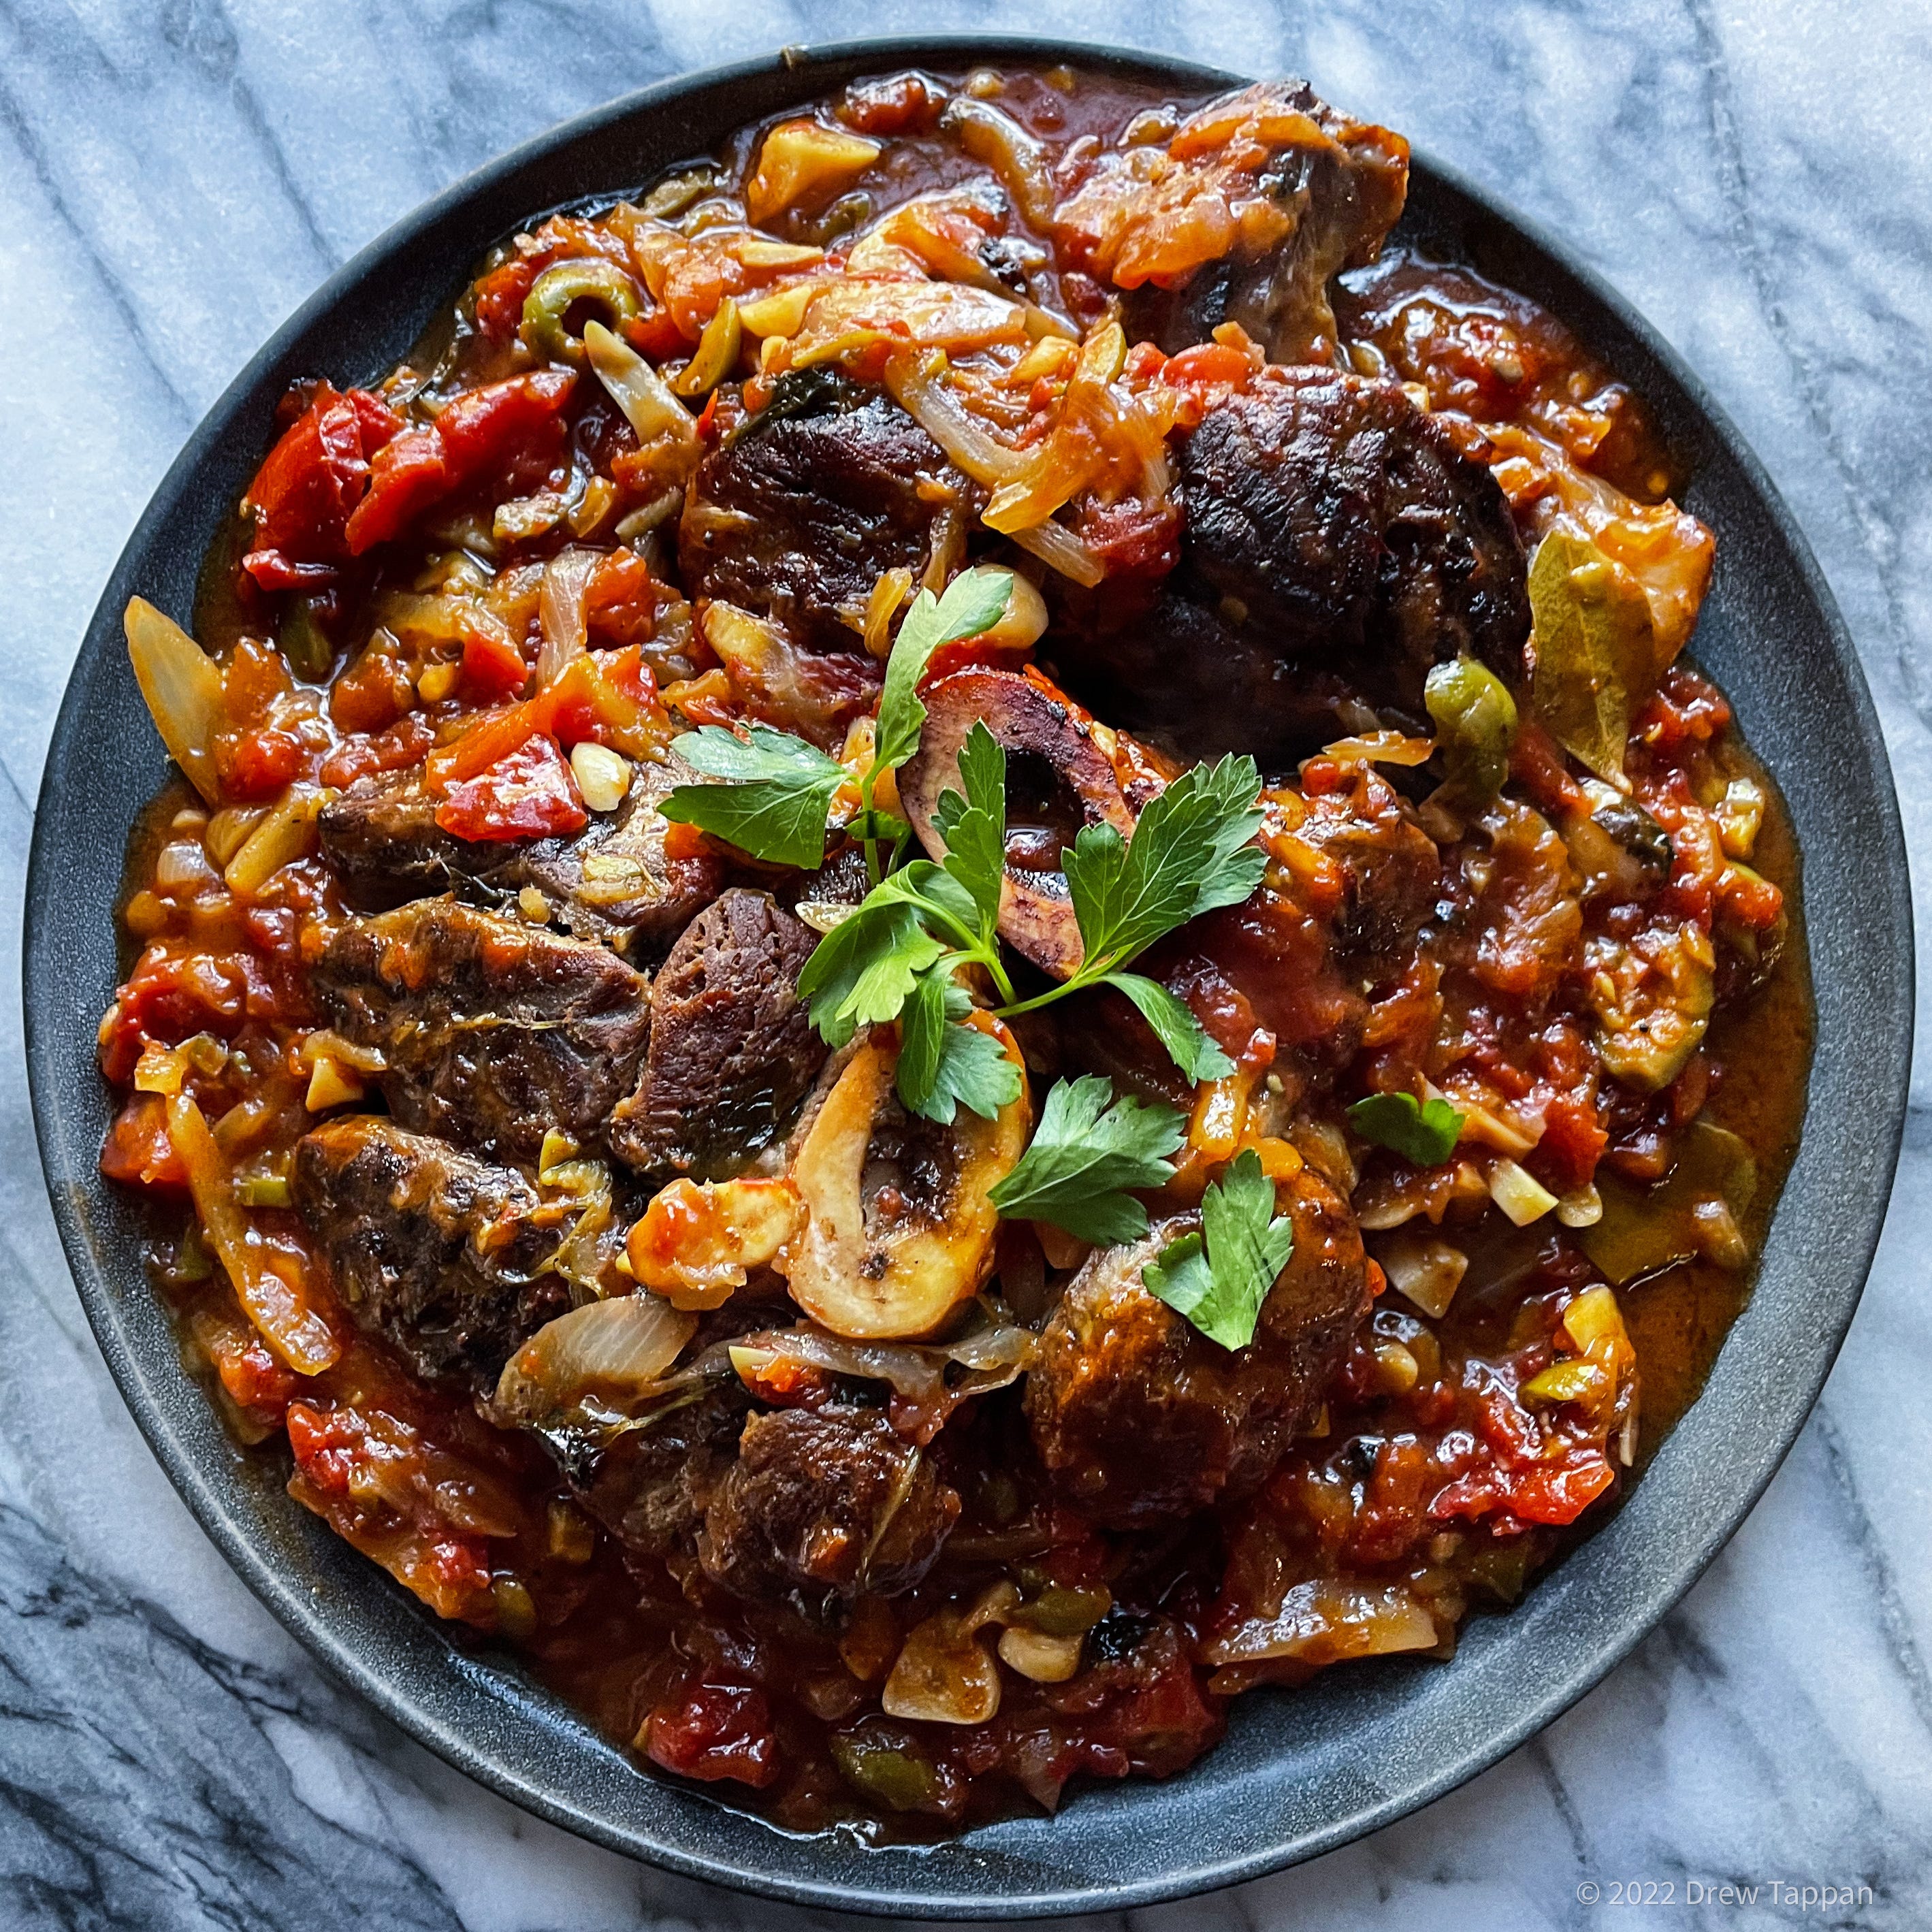
Beef Shank Braised in Orange Juice with Olives, Onions
Note: This recipe originally appeared in “Whaddya Got?” from April of this year. It was a … lets call it a celebration … of making do with what’s on hand and is one of the most read editions of The Weekly Menu.
I love beef shanks for the same reason I love beef short ribs and beef Chuck and any other big, not very tender hunk of beef. That you can braise for ages until it turns into a meltingly, soft, delicious flavor-soaked piece of well, beef. Cross cut Shanks like those you might use to make ossobuco. Or even more fun because they come with a giant bone in the middle. The bone is cool. It looks cool. It also comes filled with bone marrow that seeps into your sauce, making it even richer and more delicious. That marrow packed bone – and all the bits close to it, also contribute lots of collagen, which helps make give the sauce a fantastic texture.
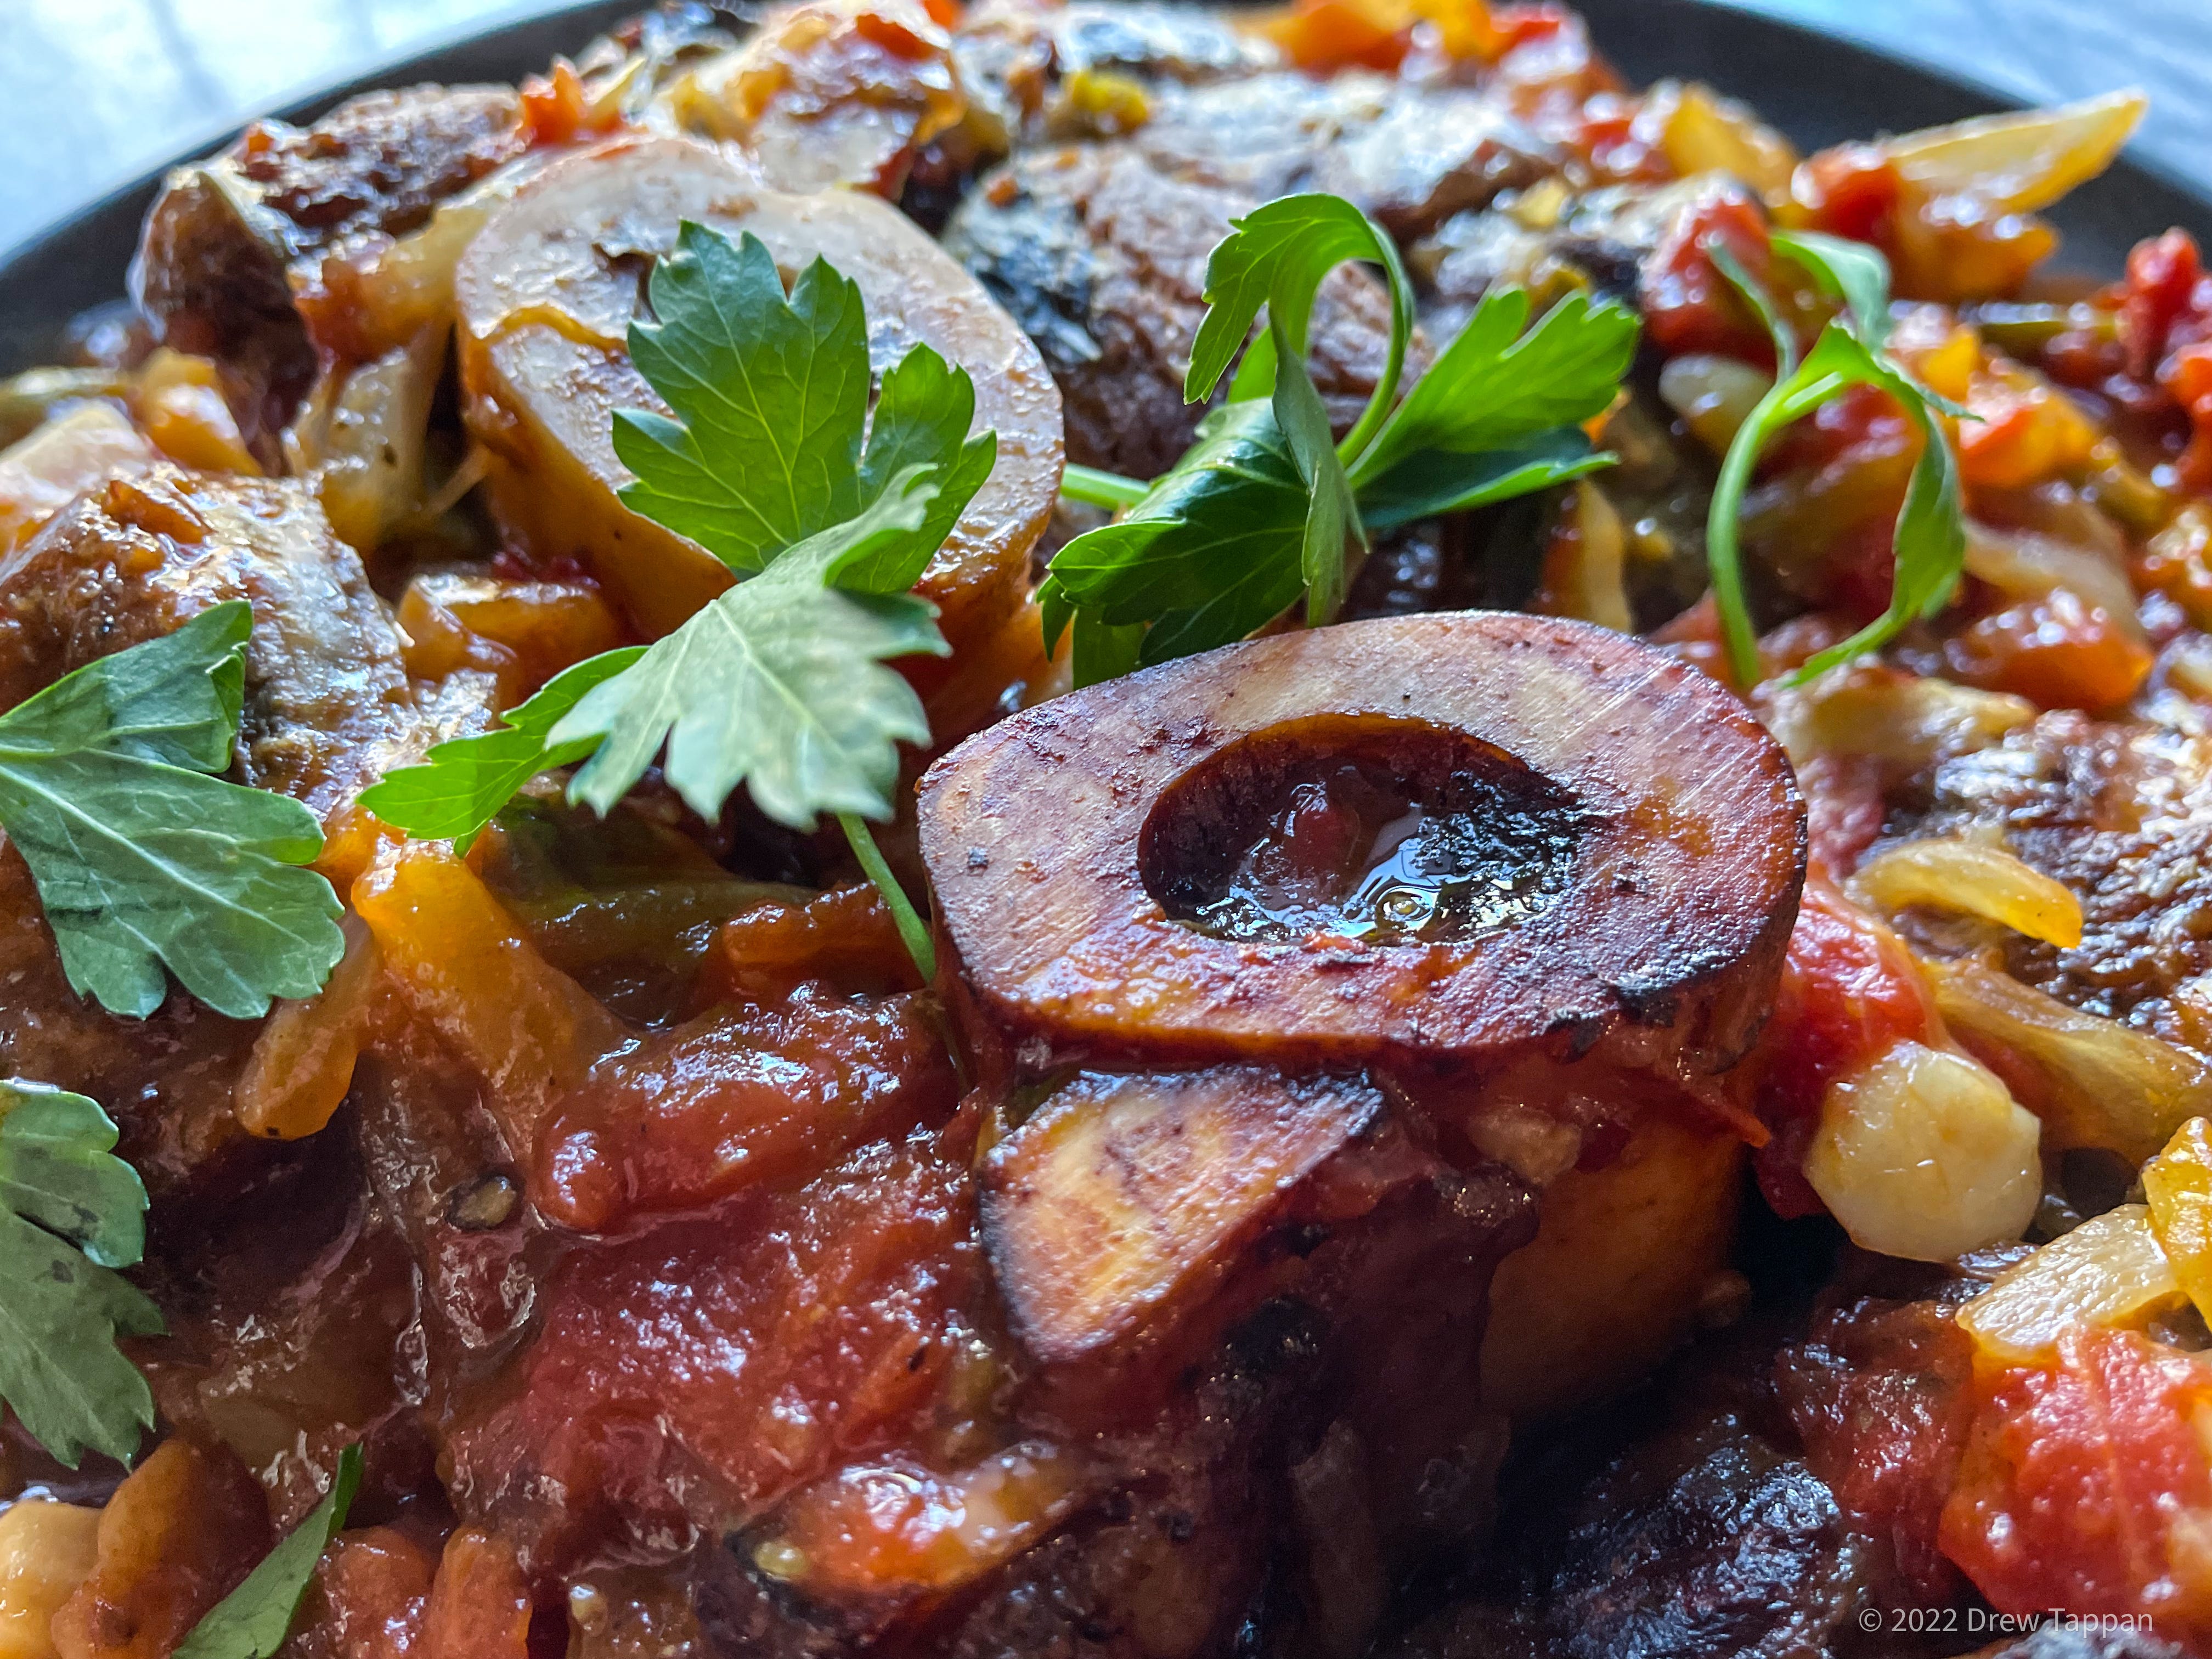
As I said above, this dish came together as sort of a what do I have in the fridge experiment, which is why I ended up putting orange juice and olives in a in a braised beef dish. It sounds like a weird combination – but of course sour or Seville oranges are a classic braising and marinade ingredient in cuisines that were influenced by Spanish cooking. The orange juice I had was five-day old home squeezed navel orange juice. Not the same thing. So … a little lime juice and I was on my way.
2 large crosscut beef shanks
2 cups orange juice
1 large onion
2 cups chicken stock
1 14-oz can peeled, diced tomatoes
6 cloves of garlic
1/2 cup sliced green olives
2 tbsp olive oil
1 tsp kosher salt
1 tsp ground black pepper
1 bay leaf
Preheat your oven to 300°F
Peel, trim, and thinly slice the onion from end to end.
Peel, trim, and coarsely chop the garlic.
Add the olive oil to an oven proof pan over medium heat.
Pat the beef dry, and brown well on both sides.
Remove the beef from the pan and set aside.
Add the garlic and onions to the pan and cook, stirring frequently, until the onions are translucent.
Add the tomatoes, the olives, the stock, orange juice, salt, pepper, and bay leaf.
Nestle the beef into the sauce and bring to a simmer.
Transfer to the oven and cook until the meat is fall apart tender – 2-4 hours depending on the size of the shanks.
Serve with yellow rice and black beans.
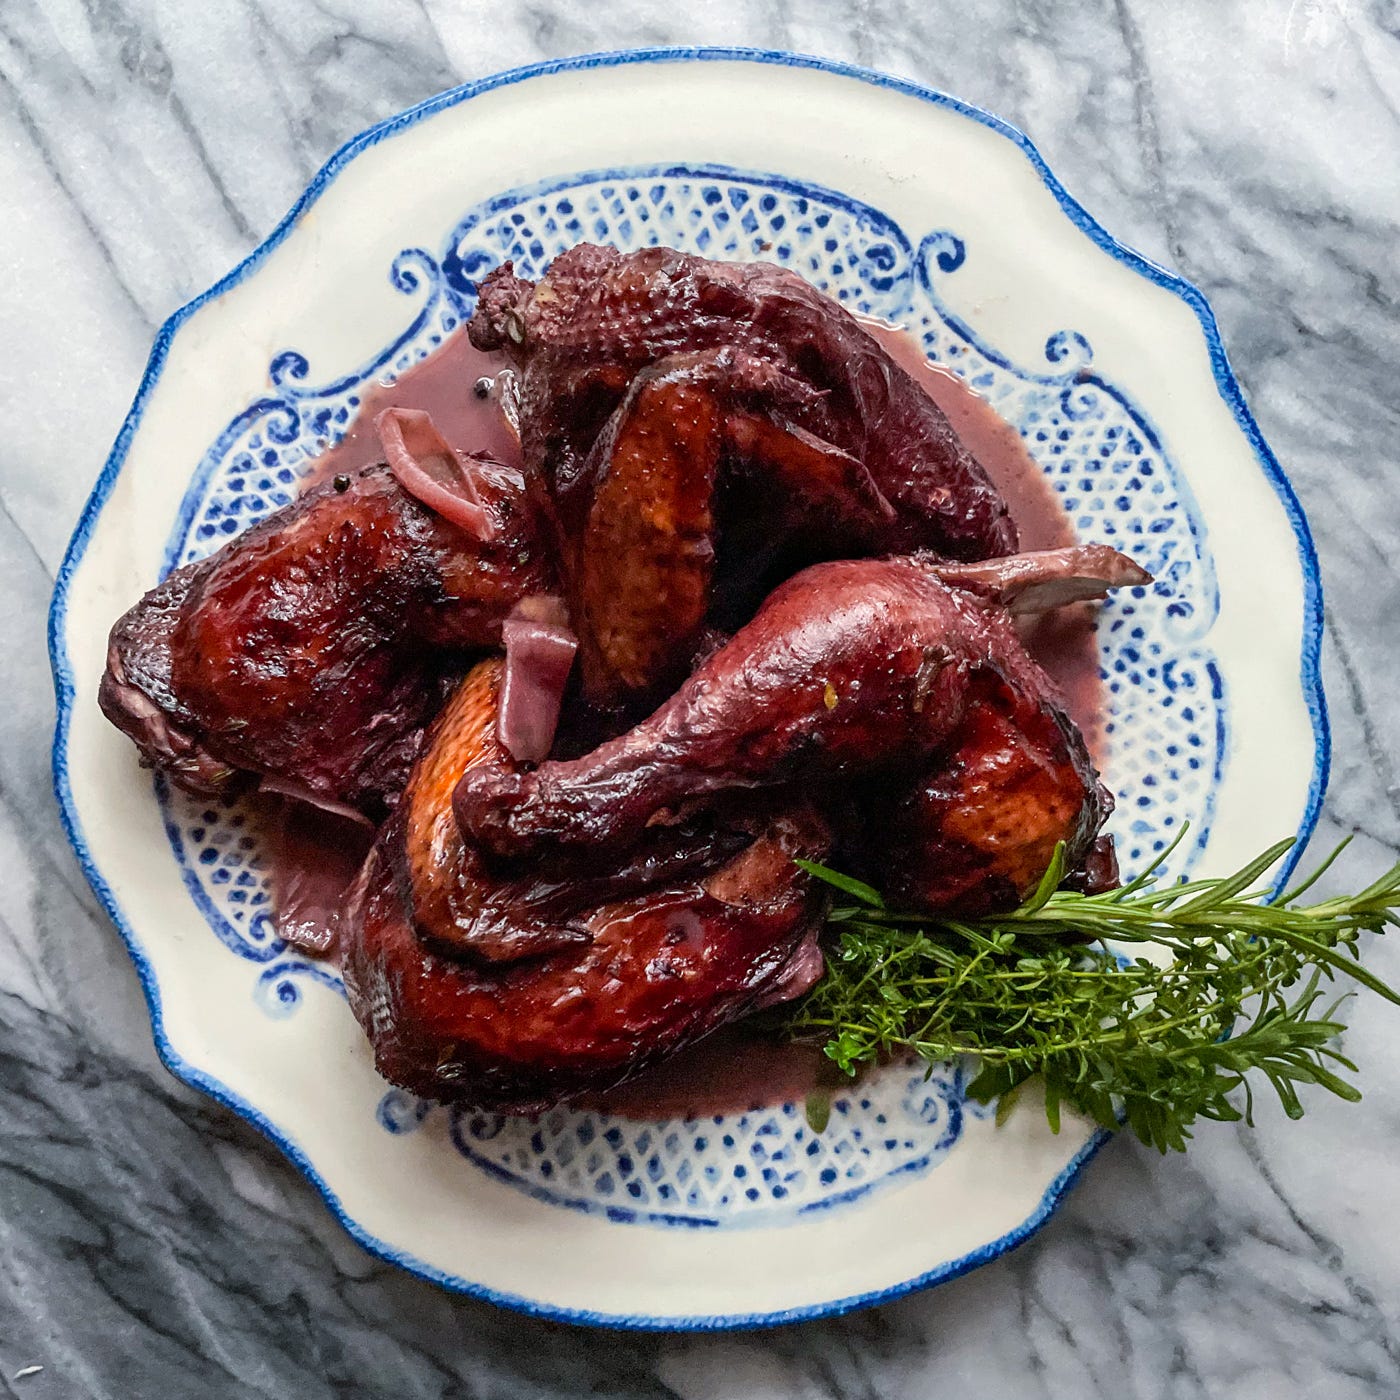
Coq au Vin
Note: This recipe appeared in “Coq of the Walk” from early November of last year.
I love Coq au Vin, and not just because I like wine. I like the color, a deep purple that stains the meat. I love the flavor, the pungent sweet and sour combination that comes from wine and onions and a long slow cook. It feels exotic, even if it originally was a way to make an almost unpalatable ingredient … palatable.
Coq au Vin was developed as a way to tame the strong flavor and tough flesh of its namesake – and old rooster. Roosters, fortunately or not, are sort of hard to come by in your average market or grocery -though a specialty poulterer may be able to track one down for you.
So, this recipe calls for a chicken. Just a chicken. A whole one – because while you can make it using parts, or an already cut up chicken, it’s more economical to cut it up ourselves and it means you can use the backbone to add some extra chicken flavor to the dish.
1 3.5-4.5 lb chicken
1 750 ml bottle dry red wine
2 cups chicken stock
2 large shallots
6 sprigs thyme
1 medium carrot
1 large stalk celery
2 tsp kosher salt
1 tsp ground black pepper
1 pinch ground cinnamon
1 pinch ground star anise/fennel
1 pinch grated nutmeg
1 pinch ground ginger
Peel, trim, and quarter 1 shallot.
Cut the chicken into 5 pieces (breast/wing, leg/thigh, backbone)
Season the chicken well with salt and pepper.
Place the chicken, the quartered shallot, salt, pepper, thyme, and the red wine in a zip top bag or container sized to hold the chicken in a manner that it can be completely submerged in the wine.)
Refrigerate at least 12 hours, and up to 36 hours.
Preheat your oven to 300°F.
Transfer the chicken and marinade to a dutch oven, or other deep, ovenproof pot.
Add the stock, spices, carrot, and celery.
Bring to simmer, and transfer to the oven to cook uncovered.
Cook uncovered for 2 hours.
Remove the pot from the oven.
Remove the chicken and other solids.
Discard the celery, carrot, and the backbone.
Peel, trim, and slice the remaining shallot.
Add to the liquid in the pan and reduce to ~2 cups of liquid.
Return the chicken to warm through.
Serve hot garnished with additional herbs.
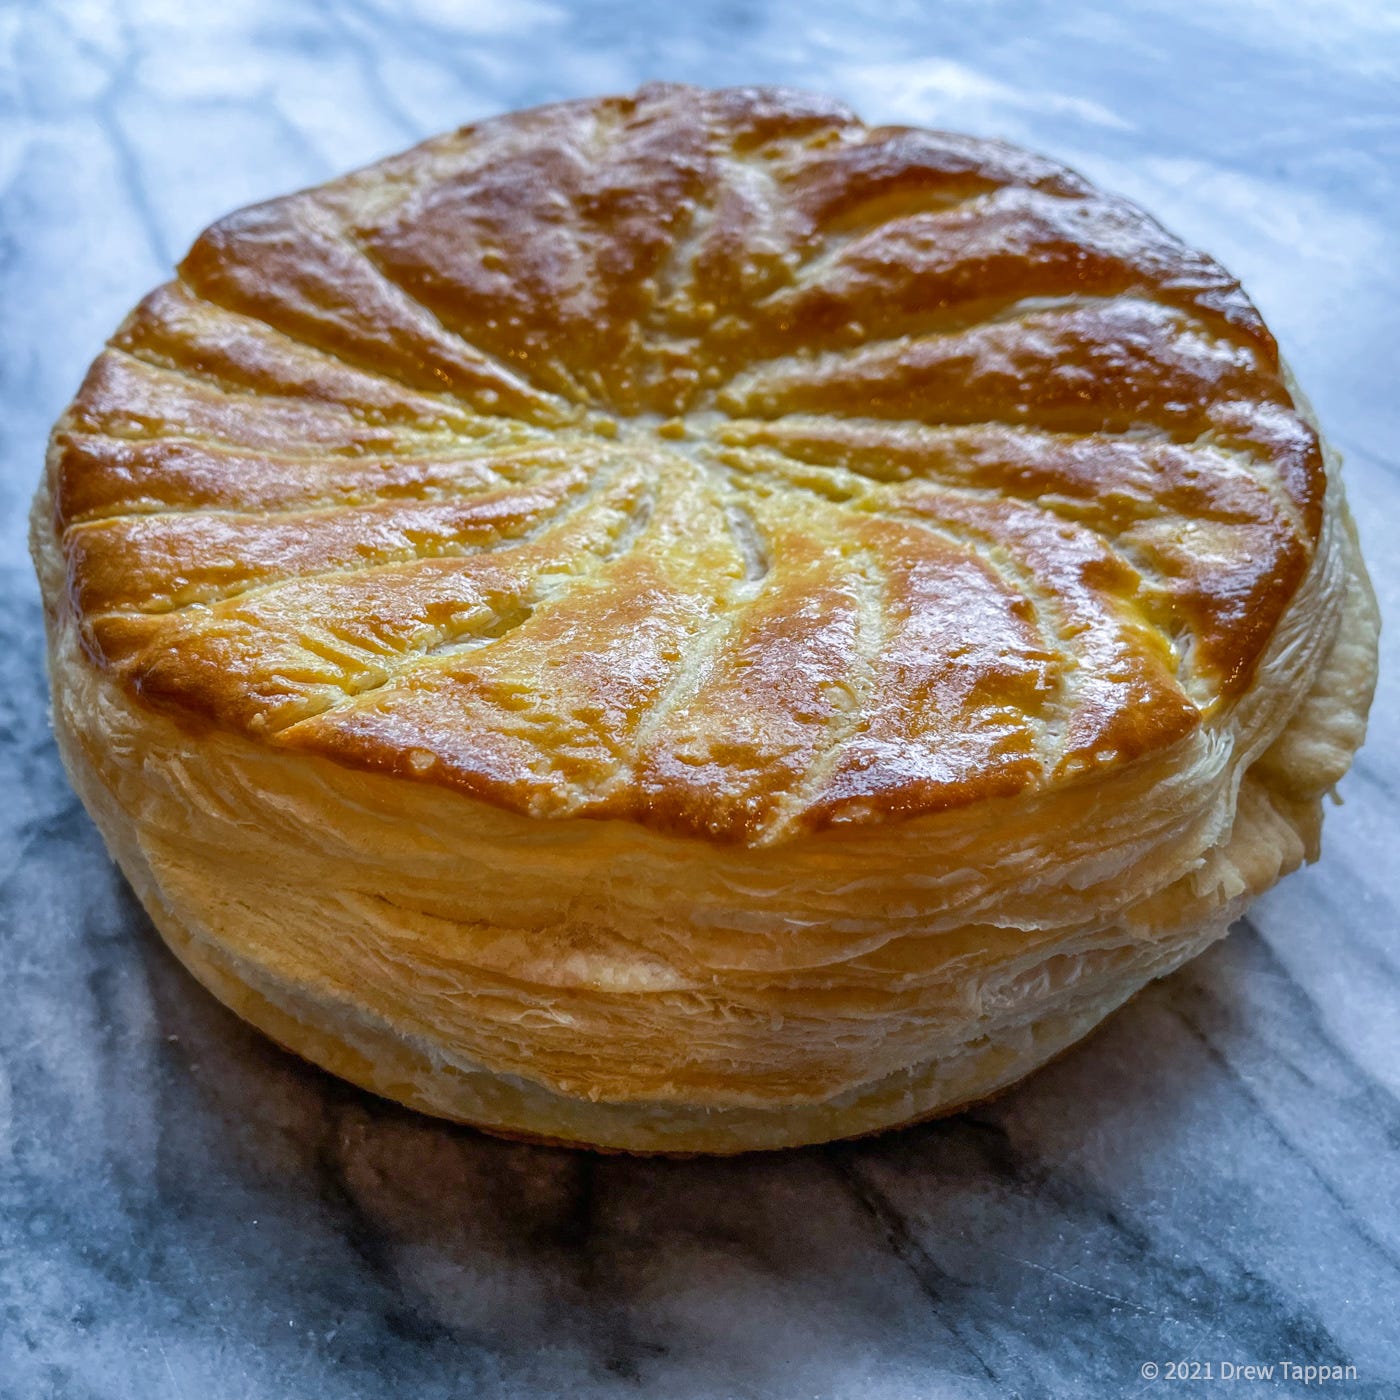
Galette des Roi
Note: This recipe, and the accompanying videos - which could be improved - appeared in “The Why of It.” from January 2022.
Galette des Roi is king cake. Not the overly frosted coated with sparkles oven baked donut of Mardi-Gras fame, but something arising from the same tradition. The New Orleans style king cake evolved from the southern French brioche style Galette des Roi baked for Epiphany - King’s Day. This Galette des Roi is the more northern style – a puff pastry crust with a frangipane (almond paste custard) filling.
Traditionally both styles included a little prize – a small ceramic baby or a bean – and whomever found it got to wear a paper crown and probably issue edicts on the behavior of the nobility or whether or not to invade Austria in the coming winter. As I understand it, this is how diplomacy has always worked. Cake, beans, French … etc.
There are two truly great things about this dessert. First of all, it’s delicious. Sweet almond filling and a spectacularly puffy layered unsweet crust are a perfect match. Secondly, it’s actually staggeringly easy to make if you take a few short cuts. I’ve included a recipe for homemade puff pastry, but you can use frozen commercial puff pastry. The homemade stuff tastes a little better, and I find making it fun – but it involves a lot of rolling and folding and if that’s not your thing, the commercial stuff is almost as good.
1 recipe puff pastry (below) or 2 sheets commercial puff pastry
1 recipe frangipane filling (below)
1 egg yolk
Preheat your oven to 400°f.
Roll out your puff pastry, and cut into two disks – how large you want to make them is up to you. I use an 8 inch ring mold as a guide.
Wet the edge of the pastry, and spread a generous amount of the filling in the center – making sure to leave at least an inch for the pastry to seal.
Top with the second disk and press to seal.
Beat the egg yolk with 1 tsp water.
Brush the top of the cake – being careful not to drip down the sides – with the egg yolk.
Allow the yolk to dry for five minutes, then cut 4 small cuts through the pastry into the filling as steam vents.
Use the point of a sharp knife, or a razor to cut very shallow decorative slashes into the egg washed pastry (being careful not to cut too deep)
Bake at 400°F until browned and puffed.
Serve at room temperature.
Puff Pastry
2 cups AP flour
1/2 cup water
pinch of salt
8 tbsp unsalted butter (1 stick)
Add the flour water, and salt to the bowl of a stand mixer fitted with a bread hook.
Process until a smooth dough has formed.
Smash the dough into a disk, and refrigerate for 30 minutes before continuing.
Cut two 10x10 inch pieces of parchment paper.
Cut a stick of butter into 4 long bars.
Arrange the bars together at the center of one of the pieces of parchment.
Top the butter with the other piece of parchment and pound and roll the butter until you have an even 8x8 inch square.
Fold over the edges of the parchment, and refrigerate the butter block for 15 minutes.
Remove the dough form the refrigerator.
Roll out into a rectangle approximately 10x12 inch.
Retrieve the butter, and center on the dough.
Stretch the edges of the dough and fold over the butter, pinching them closed.
Gently roll the dough and butter into a long rectangle.
Letter fold the rectangle, wrap in plastic and refrigerate for 20 minutes.
Remove from the refrigerator, roll out into a long rectangle, and perform another letter fold.
Repeat two additional times – refrigerating 20 minutes between each “turn.”
Roll out to ¼ inch thick before using.
Frangipane Filling
½ cup almond flour
1/4 cup granulated sugar
1 large egg
4 tbsp butter cut into small cubes.
1 tsp cornstarch
2 drops almond extract
Add all ingredients to the bowl of a food processor and process until smooth.
Refrigerate for 30 minutes prior to use (this will thicken the paste and make it easier to use.)